Cisco Nexus 9000v Vagrant Box Install
published: 19th of August 2017
Intro
This blog covers how to install Cisco Nexus 9K boxes for use with Vagrant. Great news.. if you have followed my other posts around creating Vagrant boxes from Cisco post and post images, this will not be quite as involved. Cisco has provided a Nexus vagrant box for download from cisco.com
Code versions used- nexus9kv - 7.0.3.I6.1
- Virtual Box - 5.1.26 r117224
- Vagrant - 1.9.6
- Ubuntu - 1604
Download
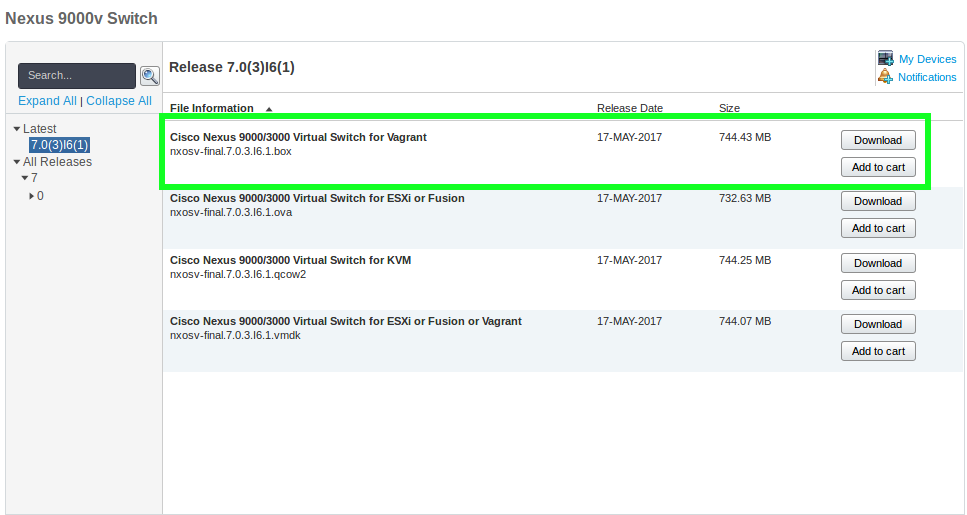
Go to the Cisco software download section and search for nexus 9000v . When you get to the product page download the .box file.
Extract the .box file as we need the .iso disk to attach to the Vagrant box.
cd ~/Downloads; mkdir n9kv
tar -xvf nxosv-final.7.0.3.I6.1.box -C n9kv
mv n9kv/nxosv_config.iso ~/vagrant/boxes/cisco/
I prefer to keep these type of boxes (Custom and/or not downloaded from Vagrant Cloud) in my home folder under ~/vagrant/boxes/
mkdir -p ~/vagrant/boxes/cisco/
mv ~/Downloads/nxosv-final.7.0.3.I6.1.box ~/vagrant/boxes/cisco/nxosv-final.7.0.3.I6.1.box
Box Install
Create a .json file that describes the Nexus Vagrant box. This file will add meta-data attributes to the Vagrant box, making it easier to work with multiple versions of Cisco Nexus 9K boxes.
Example: ~/vagrant/boxes/cisco/n9kv-7.0.3.I6.1.json{
"name": "cisco/n9kv",
"description": "Cisco Nexus9kv",
"versions": [
{
"version": "7.0.3.I6.1",
"providers": [
{
"name": "virtualbox",
"url": "file:///home/bradmin/vagrant/boxes/cisco/nxosv-final.7.0.3.I6.1.box"
}
]
}
]
}Use the vagrant box add command specifying the .json file location to add the box.
vagrant box add ~/vagrant/boxes/cisco/n9kv-7.0.3.I6.1.json

# output

==> box: Loading metadata for box '../boxes/cisco/n9kv-7.0.3.I6.1.json'
    box: URL: file:///home/bradmin/vagrant/boxes/cisco/n9kv-7.0.3.I6.1.json
==> box: Adding box 'cisco/n9kv' (v7.0.3.I6.1) for provider: virtualbox
    box: Unpacking necessary files from: file:///home/bradmin/vagrant/boxes/cisco/nxosv-final.7.0.3.I6.1.box
==> box: Successfully added box 'cisco/n9kv' (v7.0.3.I6.1) for 'virtualbox'!
Confirm that box was added with the vagrant box list command. You can see below that the cisco/n9kv box is listed along with the box type and version number (virtualbox, 7.0.3.I6.1)
vagrant box list

# output

CumulusCommunity/cumulus-vx          (virtualbox, 3.3.2)
arista/veos                          (virtualbox, 4.18.1F)
centos/7                             (virtualbox, 1705.02)
cisco/asav                           (virtualbox, 9.8.1)
cisco/csr1000v                       (virtualbox, 03.15.00)
cisco/n9kv                           (virtualbox, 7.0.3.I6.1)

debian/jessie64                      (virtualbox, 8.8.1)
juniper/ffp-12.1X47-D15.4            (virtualbox, 0.5.0)
juniper/ffp-12.1X47-D15.4-packetmode (virtualbox, 0.5.0)
juniper/vqfx10k-pfe                  (virtualbox, 0.1.0)
juniper/vqfx10k-re                   (virtualbox, 0.2.0)
ubuntu/xenial64                      (virtualbox, 20170728.0.0)
Sample Vagrant File
Cisco provided us a nice sample Vagrantfile to use.
# -*- mode: ruby -*-

# vi: set ft=ruby :

Vagrant.configure(2) do |config|
  config.vm.define "n9kv1" do |n9kv1|

    n9kv1.vm.box = "cisco/n9kv"

    # Dont try to change the insecure public key
    n9kv1.ssh.insert_key = false

    # Give the VM time to boot as Vagrant cannot tell when it is booted
    n9kv1.vm.boot_timeout = 180

    # Disable default host to guest synced folder
    n9kv1.vm.synced_folder '.', '/vagrant', disabled: true

    # Additional interfaces
    n9kv1.vm.network "private_network", ip: "192.168.1.2", auto_config: false, virtualbox__intnet: "nxosv_network1"
    n9kv1.vm.network "private_network", auto_config: false, virtualbox__intnet: "nxosv_network2"
    n9kv1.vm.network "private_network", auto_config: false, virtualbox__intnet: "nxosv_network3"
    n9kv1.vm.network "private_network", auto_config: false, virtualbox__intnet: "nxosv_network4"
    n9kv1.vm.network "private_network", auto_config: false, virtualbox__intnet: "nxosv_network5"
    n9kv1.vm.network "private_network", auto_config: false, virtualbox__intnet: "nxosv_network6"
    n9kv1.vm.network "private_network", auto_config: false, virtualbox__intnet: "nxosv_network7"

    # Make the interfaces promiscuous
    n9kv1.vm.provider :virtualbox do |vb|
            vb.customize ['modifyvm',:id,'--nicpromisc2','allow-all']
            vb.customize ['modifyvm',:id,'--nicpromisc3','allow-all']
            vb.customize ['modifyvm',:id,'--nicpromisc4','allow-all']
            vb.customize ['modifyvm',:id,'--nicpromisc5','allow-all']
            vb.customize ['modifyvm',:id,'--nicpromisc6','allow-all']
            vb.customize ['modifyvm',:id,'--nicpromisc7','allow-all']
            vb.customize ['modifyvm',:id,'--nicpromisc8','allow-all']

            # Attach the .iso we extracted earlier
            vb.customize "pre-boot", [
                    "storageattach", :id,
                    "--storagectl", "SATA",
                    "--port", "1",
                    "--device", "0",
                    "--type", "dvddrive",
                    "--medium", "/home/bradmin/vagrant/boxes/cisco/nxosv_config.iso",
            ]

      end
  end
endTesting Vagrant Box
Lets vagrant up and confirm the Nexus box builds correctly.
vagrant up

# output

Bringing machine 'n9kv1' up with 'virtualbox' provider...
==> n9kv1: Checking if box 'cisco/n9kv' is up to date...
==> n9kv1: Clearing any previously set forwarded ports...
==> n9kv1: Clearing any previously set network interfaces...
==> n9kv1: Preparing network interfaces based on configuration...
    n9kv1: Adapter 1: nat
    n9kv1: Adapter 2: intnet
    n9kv1: Adapter 3: intnet
    n9kv1: Adapter 4: intnet
    n9kv1: Adapter 5: intnet
    n9kv1: Adapter 6: intnet
    n9kv1: Adapter 7: intnet
    n9kv1: Adapter 8: intnet
==> n9kv1: Forwarding ports...
    n9kv1: 22 (guest) => 2222 (host) (adapter 1)
==> n9kv1: Running 'pre-boot' VM customizations...
==> n9kv1: Booting VM...
==> n9kv1: Waiting for machine to boot. This may take a few minutes...
    n9kv1: SSH address: 127.0.0.1:2222
    n9kv1: SSH username: vagrant
    n9kv1: SSH auth method: private key
==> n9kv1: Machine booted and ready!
==> n9kv1: Checking for guest additions in VM...
    n9kv1: No guest additions were detected on the base box for this VM! Guest
    n9kv1: additions are required for forwarded ports, shared folders, host only
    n9kv1: networking, and more. If SSH fails on this machine, please install
    n9kv1: the guest additions and repackage the box to continue.
    n9kv1:
    n9kv1: This is not an error message; everything may continue to work properly,
    n9kv1: in which case you may ignore this message.
Login to device and test with username and password: admin .
vagrant ssh

# output

-bash-4.2$ su admin
Password: <admin>

shell-init: error retrieving current directory: getcwd: cannot access parent directories: Permission denied
mesg: /dev/pts/2: Operation not permitted
shell-init: error retrieving current directory: getcwd: cannot access parent directories: Permission denied
Cisco NX-OS Software
Copyright (c) 2002-2017, Cisco Systems, Inc. All rights reserved.
NX-OSv9K software ("NX-OSv9K Software") and related documentation,
files or other reference materials ("Documentation") are
the proprietary property and confidential information of Cisco
Systems, Inc. ("Cisco") and are protected, without limitation,
pursuant to United States and International copyright and trademark
laws in the applicable jurisdiction which provide civil and criminal
penalties for copying or distribution without Cisco's authorization.

Any use or disclosure, in whole or in part, of the NX-OSv9K Software
or Documentation to any third party for any purposes is expressly
prohibited except as otherwise authorized by Cisco in writing.
The copyrights to certain works contained herein are owned by other
third parties and are used and distributed under license. Some parts
of this software may be covered under the GNU Public License or the
GNU Lesser General Public License. A copy of each such license is
available at
http://www.gnu.org/licenses/gpl.html and
http://www.gnu.org/licenses/lgpl.html
***************************************************************************
*  NX-OSv9K is strictly limited to use for evaluation, demonstration      *
*  and NX-OS education. Any use or disclosure, in whole or in part of     *
*  the NX-OSv9K Software or Documentation to any third party for any      *
*  purposes is expressly prohibited except as otherwise authorized by     *
*  Cisco in writing.                                                      *
***************************************************************************
nxosv#
When you are done, destroy the box.
 vagrant destroy -f

# output

==> default: Forcing shutdown of VM...
==> default: Destroying VM and associated drives...
Outro
Its Great to see Cisco releasing pre-configured Vagrant boxes for use by the community. Hopefully this is the start of an avalance of Cisco supported Vagrant boxes :) So... What are you waiting for get some Nexus Vagrant in your life !