Cisco ASAv Vagrant Box Install
published: 11th of August 2017
Intro
This blog covers how to install Cisco ASAv boxes for use with Vagrant. Cisco does not provide an ASAv Vagrant box on Vagrant cloud but it is possible to create a Vagrant boxes out of the ASAv VMware ova. As you will see it is a bit more involved but well worth the effort. This post assumes that you already have a working Vagrant install.
Code versions used- ASAv - 9.8.1
- Virtual Box - 5.1.26 r117224
- Vagrant - 1.9.6
- Ubuntu - 1604
Download
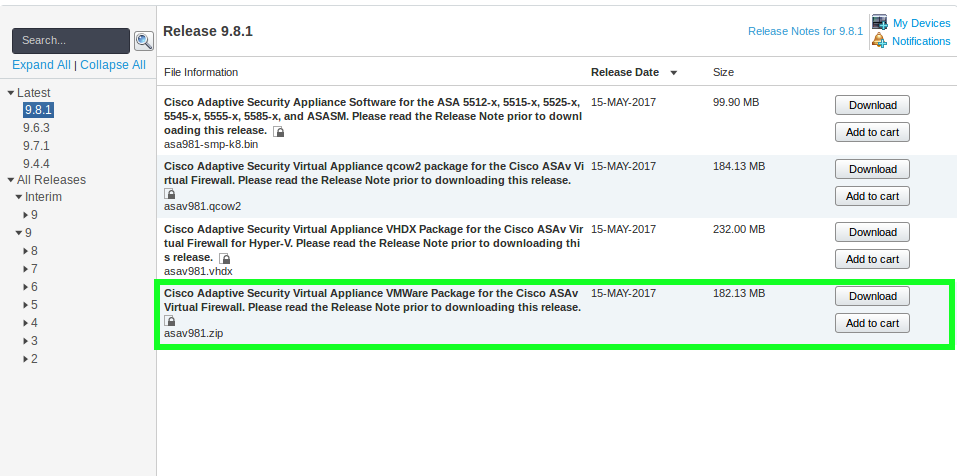
Go to the Cisco software download section and search for ASAv. When you get to the product page download the .zip file.
Import OVA
Browse to the location of the .zip file and extract it.
# extract zip file

unzip asav981.zip -d asav981

# output

Archive:  asav981.zip
  inflating: asav-vi.ovf
  inflating: asav-esxi.ovf
  inflating: boot.vmdk
  inflating: disk0.vmdk
  inflating: day0.iso
  inflating: asav-vi.mf
  inflating: asav-esxi.mf
Remove the .mf files or the VM will fail to boot in Virtualbox.
# Remove .mf files

cd asav981
rm -f *.mf
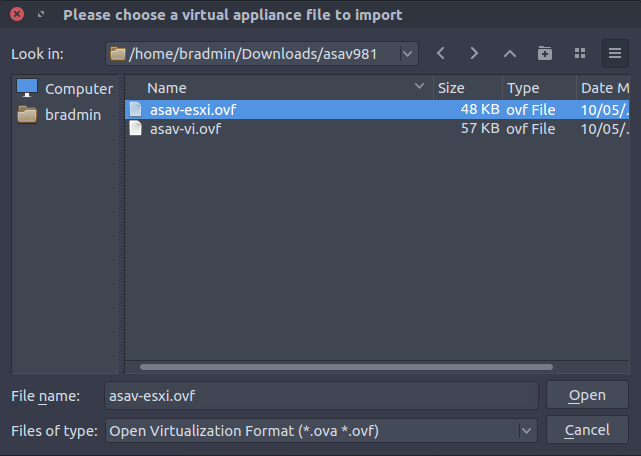
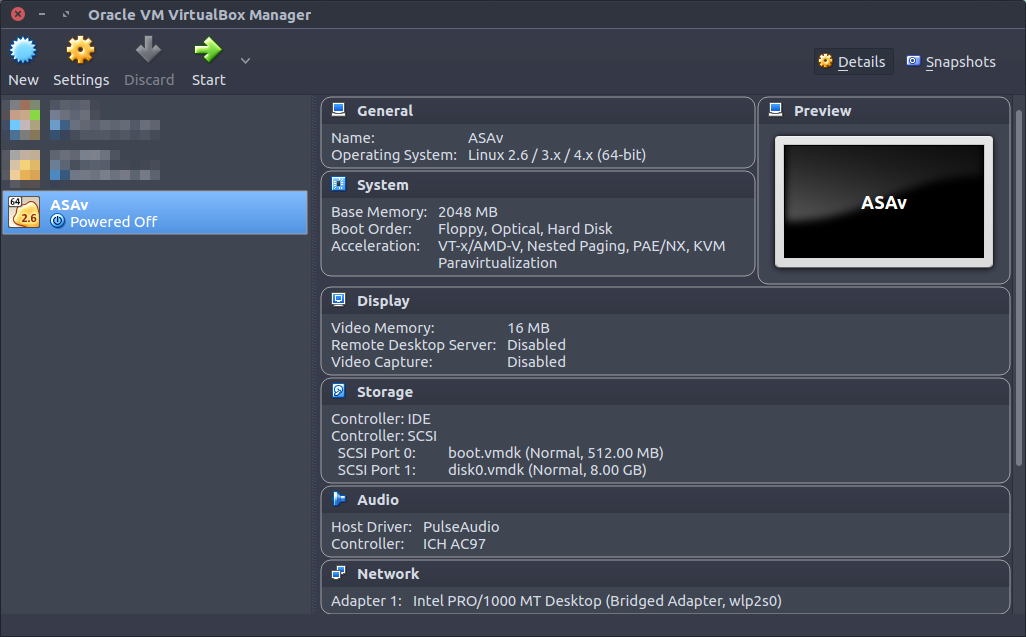
In Virutalbox go to: File > Import Appliance... and browse to the folder of the extracted ASAv and import the asav-esxi.ovf file.
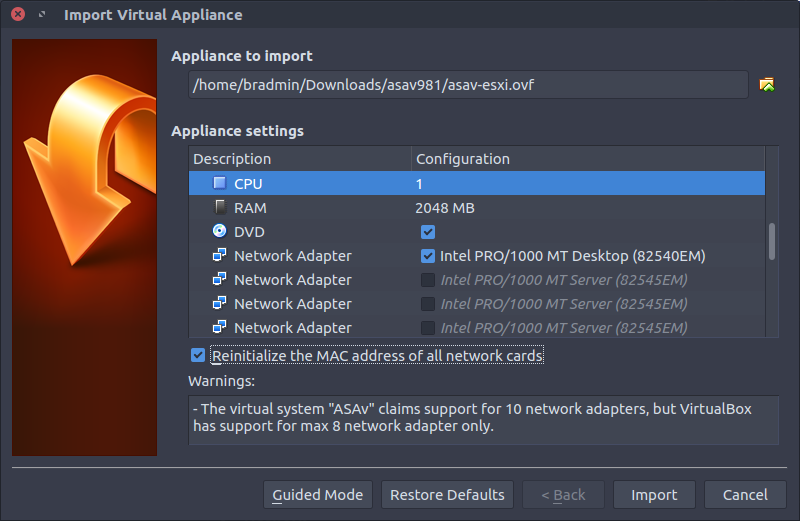
- CPUs - 1
- RAM - 2048 MB
- Network Adapters - 1
Change the network adapter type to Intel PRO/1000 MT Desktop (82540EM) and select the tick box to reinitialize the MAC addresses.
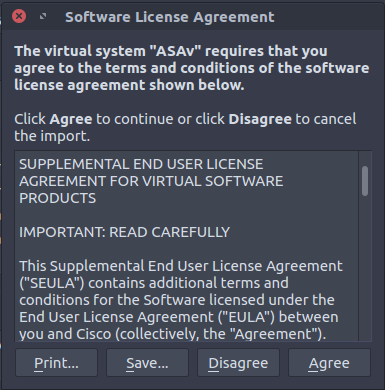
Accept the terms and conditions.
Once imported, open the virtual machines settings.
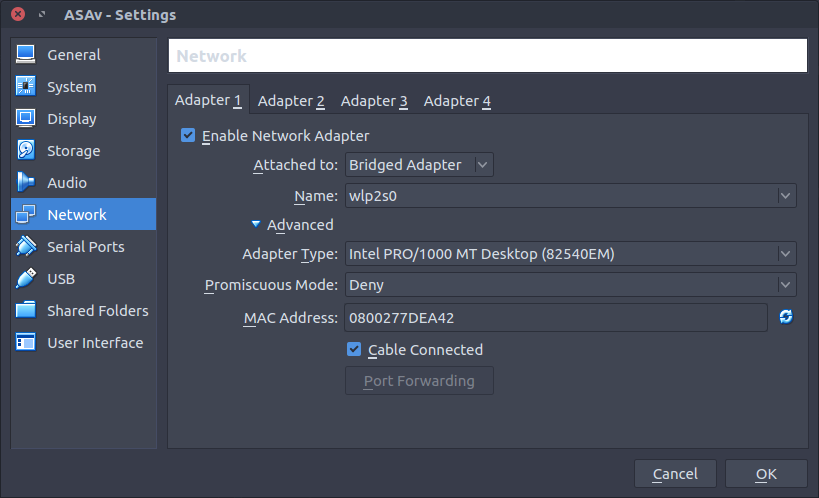
For adapter 1 attach the adapter to a network type that will get an IP address you can SSH to. A bridged adapter will get an IP address from my wireless network so I am using that for simplicity.
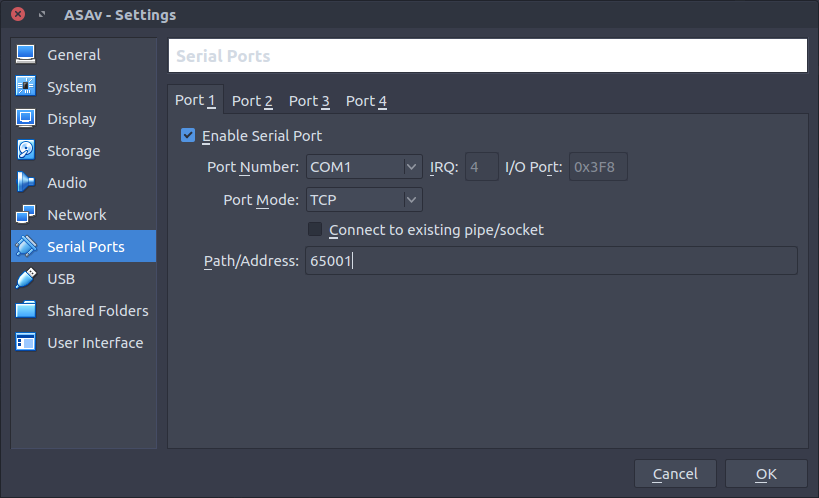
Add a TCP port for telnet access to the serial port.
Bootstrap Configuration
Configure ASAv to redirect console outputciscoasa> enable
ciscoasa# copy disk0:/coredumpinfo/coredump.cfg disk0:/use_ttyS0
! Reboot after thisNow the ASAv console will be accessible via telnet. Telnet to localhost on the TCP port defined previously.
# from bash

telnet localhost 65001
When the ASAv has booted up apply the bootstrap configuration.
# Bootstrap config

conf t
!
interface Management0/0
 nameif management
 security-level 0
 ip address dhcp
 no shutdown
!
hostname asa
username vagrant password vagrant privilege 15
aaa authentication ssh console LOCAL
aaa authorization exec LOCAL auto-enable
ssh version 2
ssh timeout 60
ssh key-exchange group dh-group14-sha1
ssh 0 0 management
domain-name lab.local
!
username vagrant attributes
  service-type admin
  ssh authentication publickey AAAAB3NzaC1yc2EAAAABIwAAAQEA6NF8iallvQVp22WDkTkyrtvp9eWW6A8YVr+kz4TjGYe7gHzIw+niNltGEFHzD8+v1I2YJ6oXevct1YeS0o9HZyN1Q9qgCgzUFtdOKLv6IedplqoPkcmF0aYet2PkEDo3MlTBckFXPITAMzF8dJSIFo9D8HfdOV0IAdx4O7PtixWKn5y2hMNG0zQPyUecp4pzC6kivAIhyfHilFR61RGL+GPXQ2MWZWFYbAGjyiYJnAmCP3NOTd0jMZEnDkbUvxhMmBYSdETk1rRgm+R4LOzFUGaHqHDLKLX+FIPKcF96hrucXzcWyLbIbEgE98OHlnVYCzRdK8jlqm8tehUc9c9WhQ==
!
end
wr mem
!
Find the IP address assigned via DHCP.
asa# show int ip brie
Interface                  IP-Address      OK? Method Status                Protocol
GigabitEthernet0/0         unassigned      YES unset  administratively down up
GigabitEthernet0/1         unassigned      YES unset  administratively down up
GigabitEthernet0/2         unassigned      YES unset  administratively down up
GigabitEthernet0/3         unassigned      YES unset  administratively down up
Management0/0              10.1.1.132      YES DHCP   up                    up
asa#
Exit the telnet session and test SSH to the ASA with the vagrant insecure private key.
# from bash

ssh vagrant@10.1.1.132 -i ~/.vagrant.d/insecure_private_key
If you can successfully SSH to the device with the SSH key, its time to create a Vagrant box.
Box Install
Poweroff the ASAv in Virtualbox and create a Vagrant base box.
vagrant package --base ASAv

# output

==> ASAv: Exporting VM...
==> ASAv: Compressing package to: /home/bradmin/package.box

# move to base box folder

mv package.box ~/vagrant/boxes/cisco/asa981-virtualbox.box
cd ~/vagrant/boxes/cisco/
Create a metadata file called asa981.json with the following contents.
{
  "name": "cisco/asav",
  "description": "Cisco ASAv",
  "versions": [
    {
      "version": "9.8.1",
      "providers": [
        {
          "name": "virtualbox",
          "url": "file:///home/bradmin/vagrant/boxes/cisco/asa981-virtualbox.box"
        }
      ]
    }
  ]
}
Add the newly created base box to Vagrant.
vagrant box add asa981.json

# output

==> box: Loading metadata for box 'asa9.8.1.json'
    box: URL: file:///home/bradmin/vagrant/boxes/cisco/asa981.json
==> box: Adding box 'cisco/asav' (v9.8.1) for provider: virtualbox
    box: Unpacking necessary files from: file:///home/bradmin/vagrant/boxes/cisco/asa981-virtualbox.box
==> box: Successfully added box 'cisco/asav' (v9.8.1) for 'virtualbox'!
Confirm Vagrant can see the box.
vagrant box list

# output

CumulusCommunity/cumulus-vx          (virtualbox, 3.3.2)
arista/veos                          (virtualbox, 4.18.1F)
centos/7                             (virtualbox, 1705.02)
cisco/asav                           (virtualbox, 9.8.1)

debian/jessie64                      (virtualbox, 8.8.1)
juniper/ffp-12.1X47-D15.4            (virtualbox, 0.5.0)
juniper/ffp-12.1X47-D15.4-packetmode (virtualbox, 0.5.0)
juniper/vqfx10k-pfe                  (virtualbox, 0.1.0)
juniper/vqfx10k-re                   (virtualbox, 0.2.0)
ubuntu/xenial64 (virtualbox, 20170728.0.0)Create a directory for testing the Vagrant environment.
mkdir ~/vagrant/asa-test; cd ~/vagrant/asa-test/Use this sample Vagrantfile.
# -*- mode: ruby -*-
# vi: set ft=ruby :

Vagrant.configure("2") do |config|
  config.vm.box = "cisco/asav"

  # Dont try to change the insecure public key
  config.ssh.insert_key = false

  # Disable default host to guest synced folder
  config.vm.synced_folder ".", "/vagrant", disabled: true

  # Give the VM time to boot as Vagrant cannot tell when it is booted
  config.vm.boot_timeout = 120

  # Additional interfaces
  config.vm.network "private_network", ip: "169.254.1.11", auto_config: false
  config.vm.network "private_network", ip: "169.254.1.12", auto_config: false
  config.vm.network "private_network", ip: "169.254.1.13", auto_config: false
  config.vm.network "private_network", ip: "169.254.1.14", auto_config: false

  # Telnet serial port
  config.vm.provider "virtualbox" do |vb|
    vb.customize ["modifyvm", :id, "--uart1", "0x3f8", "4"]
    vb.customize ["modifyvm", :id, "--uartmode1", "tcpserver", "65001"]
  end

end
Testing Vagrant Box
Its time to build, so vagrant up and confirm the ASAv box builds correctly.
vagrant up

# output

Bringing machine 'default' up with 'virtualbox' provider...
==> default: Importing base box 'cisco/asav'...
==> default: Matching MAC address for NAT networking...
==> default: Checking if box 'cisco/asav' is up to date...
==> default: Setting the name of the VM: asa-test_default_1502459595125_94686
==> default: Clearing any previously set network interfaces...
==> default: Preparing network interfaces based on configuration...
    default: Adapter 1: nat
    default: Adapter 2: hostonly
    default: Adapter 3: hostonly
    default: Adapter 4: hostonly
    default: Adapter 5: hostonly
==> default: Forwarding ports...
    default: 22 (guest) => 2222 (host) (adapter 1)
==> default: Running 'pre-boot' VM customizations...
==> default: Booting VM...
==> default: Waiting for machine to boot. This may take a few minutes...
    default: SSH address: 127.0.0.1:2222
    default: SSH username: vagrant
    default: SSH auth method: private key
==> default: Machine booted and ready!
==> default: Checking for guest additions in VM...
    default: No guest additions were detected on the base box for this VM! Guest
    default: additions are required for forwarded ports, shared folders, host only
    default: networking, and more. If SSH fails on this machine, please install
    default: the guest additions and repackage the box to continue.
    default:
    default: This is not an error message; everything may continue to work properly,
    default: in which case you may ignore this message.
Login to device and test.
vagrant ssh

# output

User vagrant logged in to asa
Logins over the last 1 days: 4.  Last login: 13:54:48 UTC Aug 11 2017 from 10.0.2.2
Failed logins since the last login: 0.
Type help or '?' for a list of available commands.
asa# show version

Cisco Adaptive Security Appliance Software Version 9.8(1)
Firepower Extensible Operating System Version 2.2(1.47)
Device Manager Version 7.8(1)

Compiled on Wed 10-May-17 15:39 PDT by builders
System image file is "boot:/asa981-smp-k8.bin"
Config file at boot was "startup-config"

asa up 2 mins 25 secs

Hardware:   ASAv, 2048 MB RAM, CPU Lynnfield 2808 MHz,
Model Id:   ASAv10
Internal ATA Compact Flash, 512MB
Slot 1: ATA Compact Flash, 8192MB
BIOS Flash Firmware Hub @ 0x0, 0KB


 0: Ext: Management0/0       : address is 0800.2782.112a, irq 10
 1: Ext: GigabitEthernet0/0  : address is 0800.2725.1be9, irq 9
 2: Ext: GigabitEthernet0/1  : address is 0800.2715.c7c8, irq 11
 3: Ext: GigabitEthernet0/2  : address is 0800.2744.139a, irq 10
 4: Ext: GigabitEthernet0/3  : address is 0800.273d.3e47, irq 9

License mode: Smart Licensing
ASAv Platform License State: Unlicensed
No active entitlement: no feature tier and no throughput level configured
*Memory resource allocation is more than the permitted limit.

Licensed features for this platform:
Maximum VLANs                     : 50
Inside Hosts                      : Unlimited
Failover                          : Active/Standby
Encryption-DES                    : Enabled
Encryption-3DES-AES               : Enabled
Security Contexts                 : 0
Carrier                           : Disabled
AnyConnect Premium Peers          : 2
AnyConnect Essentials             : Disabled
Other VPN Peers                   : 250
Total VPN Peers                   : 250
AnyConnect for Mobile             : Disabled
AnyConnect for Cisco VPN Phone    : Disabled
Advanced Endpoint Assessment      : Disabled
Shared License                    : Disabled
Total TLS Proxy Sessions          : 2
Botnet Traffic Filter             : Enabled
Cluster                           : Disabled

Serial Number: 9ABLC0QNCNJ

Image type          : Release
Key version         : A

Configuration has not been modified since last system restart.
asa#
When you are done, destroy the box.
 vagrant destroy -f

# output

==> default: Forcing shutdown of VM...
==> default: Destroying VM and associated drives...
Outro
There you have it, a nice and easy throw away Cisco ASAv Vagrant box for all your labbing and testing pleasure.
Links
https://www.cisco.com/c/en/us/td/docs/security/asa/asa98/asav/quick-start/asav-quick/asav-kvm.html
http://binarynature.blogspot.com.au/2016/07/cisco-asav-vagrant-box-for-vmware-fusion.html#!
http://brezular.com/2015/01/26/qemu-asav-appliance-as-personal-firewall-on-linux/
https://www.virtualbox.org/manual/ch08.html#vboxmanage-modifyvm
https://github.com/mitchellh/vagrant/blob/master/keys/vagrant.pub