Viptela vSmart Vagrant Libvirt Box Install
published: 1st of January 2018
Intro
Previously I created a vManage and a vBond/vEdge Vagrant box for use with the vagrant-libvirt provider. In this post I will show you how to install a Viptela vSmart appliance for use with the vagrant-libvirt provider.
For reference the following software will be used in this post.
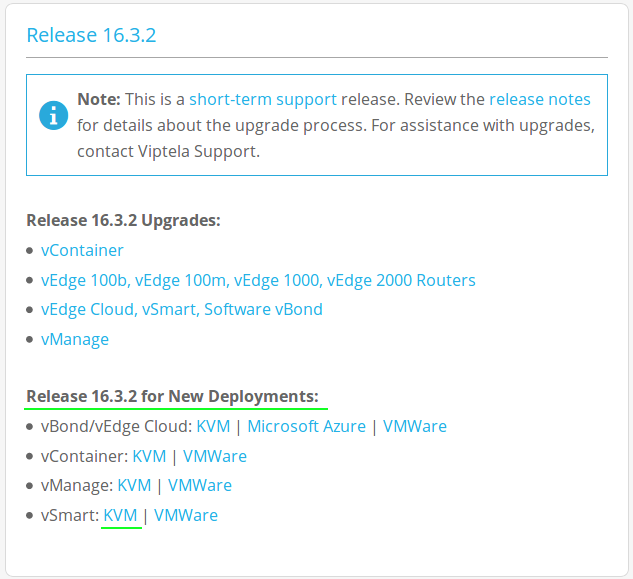
- Viptela vSmart - 16.3.2
- Vagrant - Vagrant 2.0.1
- vagrant-libvirt - 0.4.0
- Ubuntu - 1604
Download
Viptela does not host any boxes on Vagrant cloud so we will need to build it ourselves. Go to https://docs.viptela.com/Downloads and dowload the 16.3.2 vSmart KVM image for new deployments.
Install
Create and change into directory for vSmart files. I like to keep my custom vagrant boxes under ~/vagrant/boxes/ .
mkdir -p ~/vagrant/boxes/viptela
cd ~/vagrant/boxes/viptela
Copy the .qcow2 file downloaded earlier to the ~/vagrant/boxes/viptela directory.
cp ~/Downloads/viptela-16-3-2/viptela-smart-genericx86-64.qcow2 .Use the below virt-install command to build the vSmart VM. Be sure to add at least two interfaces.
virt-install \
    --name vsmart-base \
    --os-type linux \
    --os-variant ubuntu14.04 \
    --cpu host \
    --vcpus=2 \
    --hvm \
    --arch=x86_64 \
    --ram 1024 \
    --disk path=viptela-smart-genericx86-64.qcow2,size=16,device=disk,bus=ide,format=qcow2 \
    --network=network:vagrant-libvirt,model=virtio \
    --network=network:vagrant-libvirt,model=virtio \
    --graphics none \
    --import
A virtual console will be connected to the VM and you will see the below. It will take about a minute for the VM to boot, once it does login with the username: admin and password: admin .
Starting install...
Creating domain...                                                                                                                                                                          |    0 B  00:00:01
Connected to domain vsmart-base
Escape character is ^]
viptela 16.3.2
vedge login:
Apply the following bootstrap configuration.
config
system
  aaa
  user vagrant
    password $6$yW1ez6tP1rqv15nA$2uA0TXEIuCuGnPa4bUVCSN4o5b.wU/WMzBa4kjYvBz4B/EbbJY3he9CMaY0UWPi0joUqUxYC.F6xbYHQQcq2o/
    group    netadmin
    !
  !
  vpn 0
    no int eth0
    !
  vpn 512
    int eth0
    ip dhcp-client
    no shutdown
  !
  commit and-quit
!
The bootstrap config will create the vagrant user with the password vagrant but we still need to load the vagrant ssh key.
Login to the vshell with the vshell command.
# viptela_cli

vsmart# vshell

# Now in vshell

vsmart:~$
Switch to the vagrant user.
su vagrant
password: <vagrant>

# log back into vshell

vsmart# vshell
Create the .ssh directory.
mkdir /home/vagrant/.ssh && cd /home/vagrant/.sshUse vim to add the vagrant public key to the authorized_keys file.
/home/vagrant/.ssh/authorized_keys

ssh-rsa AAAAB3NzaC1yc2EAAAABIwAAAQEA6NF8iallvQVp22WDkTkyrtvp9eWW6A8YVr+kz4TjGYe7gHzIw+niNltGEFHzD8+v1I2YJ6oXevct1YeS0o9HZyN1Q9qgCgzUFtdOKLv6IedplqoPkcmF0aYet2PkEDo3MlTBckFXPITAMzF8dJSIFo9D8HfdOV0IAdx4O7PtixWKn5y2hMNG0zQPyUecp4pzC6kivAIhyfHilFR61RGL+GPXQ2MWZWFYbAGjyiYJnAmCP3NOTd0jMZEnDkbUvxhMmBYSdETk1rRgm+R4LOzFUGaHqHDLKLX+FIPKcF96hrucXzcWyLbIbEgE98OHlnVYCzRdK8jlqm8tehUc9c9WhQ== vagrant insecure public key
Exit back to the viptela_cli and use the show int | tab command to get the IP address assigned to the eth0 interface.
vshell

vsmart:/home/vagrant/.ssh$ exit

viptela_cli

vsmart# show int | tab

# output

                                         IF      IF                                                          TCP
                AF                       ADMIN   OPER    ENCAP  PORT                          SPEED          MSS             RX       TX
VPN  INTERFACE  TYPE  IP ADDRESS         STATUS  STATUS  TYPE   TYPE  MTU  HWADDR             MBPS   DUPLEX  ADJUST  UPTIME  PACKETS  PACKETS
-----------------------------------------------------------------------------------------------------------------------------------------------
0    eth1       ipv4  -                  Down    Down    -      -     -    52:54:00:a0:9b:43  -      -       -       -       -        -
512  eth0       ipv4  192.168.121.86/24  Up      Up      null   mgmt  -    52:54:00:e9:c2:c1  -      -       -       -       87       31
From another terminal, confirm that you can ssh to the vSmart with the Vagrant insecure_private_key .
ssh vagrant@192.168.121.86 -i ~/.vagrant.d/insecure_private_key

# Success

Welcome to Viptela CLI
vagrant connected from 192.168.121.1 using ssh on vsmart
vsmart#
If you successfully connected, poweroff the vSmart in preparation for the Vagrant box creation.
vsmart# poweroff
Are you sure you want to power off the system? [yes,NO] yes
To exit the console use one of these key combinations (Assuming English keyboard).
- CTRL + ]
- CTRL + 5
- Press and hold CTRL and SHIFT while pressing 6 then ]
Box Creation
The maintainers of the vagrant-libvirt plugin have a script that can be used to convert .qcow2 images to a vagrant box. Download the libvirt conversion script.
curl -O https://raw.githubusercontent.com/vagrant-libvirt/vagrant-libvirt/master/tools/create_box.shCreate a metadata.json file.
echo '{"provider":"libvirt","format":"qcow2","virtual_size":16}' > metadata.jsonUse the create_box.sh script to make a Vagrant box from the .qcow2 image.
bash create_box.sh viptela-smart-genericx86-64.qcow2

# output

{11}
==> Creating box, tarring and gzipping
./metadata.json
./Vagrantfile
./box.img
Total bytes written: 191764480 (183MiB, 38MiB/s)
==> viptela-smart-genericx86-64.box created
==> You can now add the box:
==>   'vagrant box add viptela-smart-genericx86-64.box --name viptela-smart-genericx86-64'
Create a metadata file called vsmart.json so that the box is added with the correct version number.
 {
   "name": "viptela/vsmart",
   "description": "Viptela vSmart",
   "versions": [
     {
       "version": "16.3.2",
       "providers": [
         {
           "name": "libvirt",
           "url": "file:///home/bradmin/vagrant/boxes/viptela/viptela-smart-genericx86-64.box"
         }
       ]
     }
   ]
 }
Add the box to Vagrant using the vsmart.json file.
vagrant box add vsmart.json

# output

==> box: Loading metadata for box 'vsmart.json'
    box: URL: file:///home/bradmin/vagrant/boxes/viptela/vsmart.json
==> box: Adding box 'viptela/vsmart' (v16.3.2) for provider: libvirt
    box: Unpacking necessary files from: file:///home/bradmin/vagrant/boxes/viptela/viptela-smart-genericx86-64.box
==> box: Successfully added box 'viptela/vsmart' (v16.3.2) for 'libvirt'!
Confirm the vSmart box was added successfully.
vagrant box list

# output

CumulusCommunity/cumulus-vx          (libvirt, 3.4.1)
.
. <snip>
.
viptela/vbond-vedge                  (libvirt, 16.3.2)
viptela/vmanage                      (libvirt, 16.3.2)
viptela/vsmart                       (libvirt, 16.3.2)

vyos/current                         (libvirt, 999.201712301253)
Vagrantfile
Use this Vagrantfile to test out the new vSmart Vagrant box.
# -*- mode: ruby -*-
# vi: set ft=ruby :

Vagrant.configure("2") do |config|
  config.vm.box = "viptela/vsmart"

  # Turn off shared folders
  config.vm.synced_folder ".", "/vagrant", id: "vagrant-root", disabled: true

  # Do not try to insert new SSH key
  config.ssh.insert_key = false

  # Give VM time to boot
  config.vm.boot_timeout = 180

  # Provider-specific configuration
  config.vm.provider :libvirt do |domain|
    domain.memory = 1024
    domain.cpus = 2
  end

  # Additional Interfaces
  config.vm.network "private_network", ip: "169.254.1.11", auto_config: false
  config.vm.network "private_network", ip: "169.254.1.12", auto_config: false
end
Testing
Lets vagrant up and make sure we can connect to the vSmart.
vagrant up

# output

Bringing machine 'default' up with 'libvirt' provider...
==> default: Uploading base box image as volume into libvirt storage...
==> default: Creating image (snapshot of base box volume).
==> default: Creating domain with the following settings...
==> default:  -- Name:              viptela_default
==> default:  -- Domain type:       kvm
==> default:  -- Cpus:              2
==> default:  -- Feature:           acpi
==> default:  -- Feature:           apic
==> default:  -- Feature:           pae
==> default:  -- Memory:            1024M
==> default:  -- Management MAC:
==> default:  -- Loader:
==> default:  -- Base box:          viptela/vsmart
==> default:  -- Storage pool:      default
==> default:  -- Image:             /var/lib/libvirt/images/viptela_default.img (11G)
==> default:  -- Volume Cache:      default
==> default:  -- Kernel:
==> default:  -- Initrd:
==> default:  -- Graphics Type:     vnc
==> default:  -- Graphics Port:     5900
==> default:  -- Graphics IP:       127.0.0.1
==> default:  -- Graphics Password: Not defined
==> default:  -- Video Type:        cirrus
==> default:  -- Video VRAM:        9216
==> default:  -- Sound Type:
==> default:  -- Keymap:            en-us
==> default:  -- TPM Path:
==> default:  -- INPUT:             type=mouse, bus=ps2
==> default: Creating shared folders metadata...
==> default: Starting domain.
==> default: Waiting for domain to get an IP address...
==> default: Waiting for SSH to become available...
==> default: Configuring and enabling network interfaces...


The guest operating system of the machine could not be detected!
Vagrant requires this knowledge to perform specific tasks such
as mounting shared folders and configuring networks. Please add
the ability to detect this guest operating system to Vagrant
by creating a plugin or reporting a bug.Lets test SSH to the vSmart.
# from host shell

vagrant ssh

# now in vSmart shell

Welcome to Viptela CLI
vagrant connected from 192.168.121.1 using ssh on vsmart
vsmart# show version
16.3.2
Awesome, we are able to connect now lets clean up the box.
# from host shell

vagrant destroy -f

# output

==> default: Removing domain...
Outro
If you have followed along my other two post to build the Viptela vManage and vBond/vEdge you will now have all the components required to start building out and testing the Cisco/Viptela SD-WAN labs.