Moonlander Keyboard
published: 2nd of April 2022
Intro
For the past year and a half or so, I have been using the Moonlander keyboard from ZSA. I absolutly love the keyboard and this post is a summary of my experience and how I have it setup.
Motivation
When you do something a lot, IMHO it's worth investing in tools that help you do the "thing" more efficently and effectively. Using the right tool for the job means being more productive and safe while you are doing it. I spend alot of time on the keyboard for both work and leisure so it is important to me to use the best tools I can find.
There are a number of split keyboards on the market, I went with the Moonlander based on the following features:
- Split design
- Columnar layout
- Hot-swappable switches
- Build-in palm rest
- Programmable keys with multiple layers
Let me touch on these points a little.
Split Design
The keyboard is split into halves which allows you to have your hands at a comfortable width apart and also helps keep your shoulders back preventing you from hunching over.
Columnar Layout
The keys are not staggered like a regular keyboard, they are straight up and down. This takes a bit of getting used to but after a couple of weeks it feels more natural.
Hot-swappable Switches
The key switches can be swapped out without any soldering required.
Build-in Palm Rest
I find that with all mechanical keyboards I need a palm rest or my wrists ache after a couple of hours. I think this is due to the keys being higher off the desk than a standard keyboard. The Moonlander has palm rests build right in.
Programmable Keys With Multiple Layers
Every key on the Moonlander can be remapped to be any key. So you can have any keyboard layout (QWERTY, Dvorak, your own, etc...) you desire. It also supports mutiple layers of layouts, more on this later.
Keeb
This is what it looks like from the top. Sexy AF!
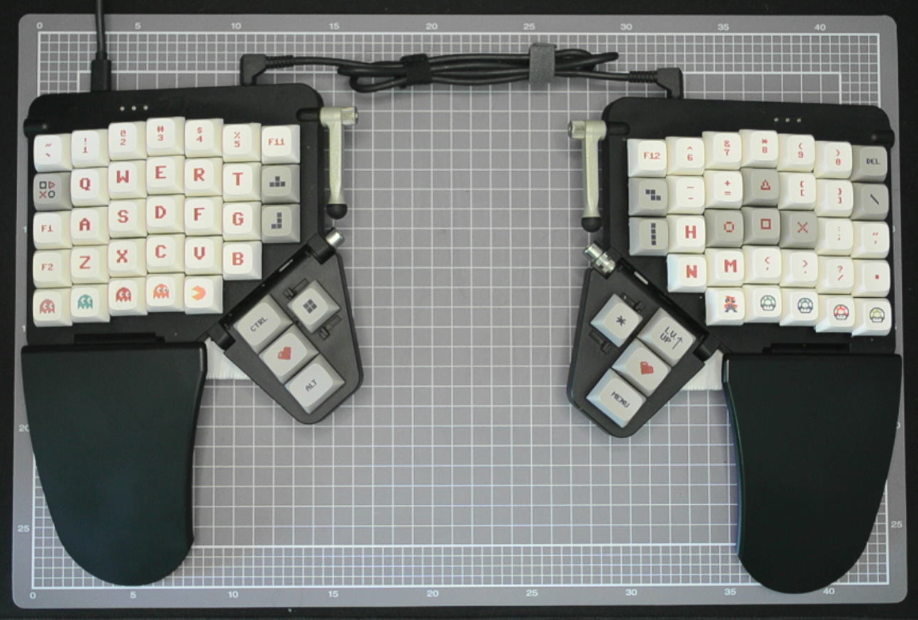
Keycaps
I didn't like the keycaps that shipped with the board (although they were fine). I swapped them out for these retro gaming style XDA profile keycaps. XDA profile keys are all the same height and shape.
Key Switches
I originally purchased the keyboard with Cherry MX Brown switches, which are great, but I wanted something a bit quieter. I ended up going with Gazzew Boba U4 (68g) from Outemu. They are really quiet and have a nice tactile bump. I have also lubed the switches to make them a bit smoother, and use o-rings to reduce the bottom out noise.
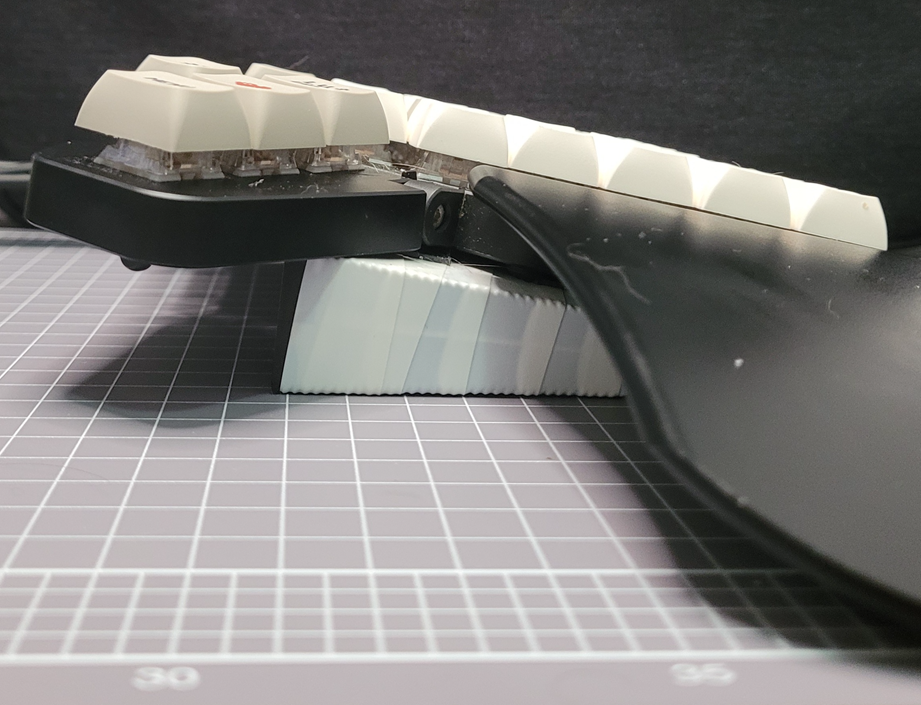
Tenting
The keyboard has a tenting system, but I find it a bit wobbly at my preferred tenting position. To get around this, I have taped 3 of these wedges together, and use double sided tape to secure them to the bottom of each side.
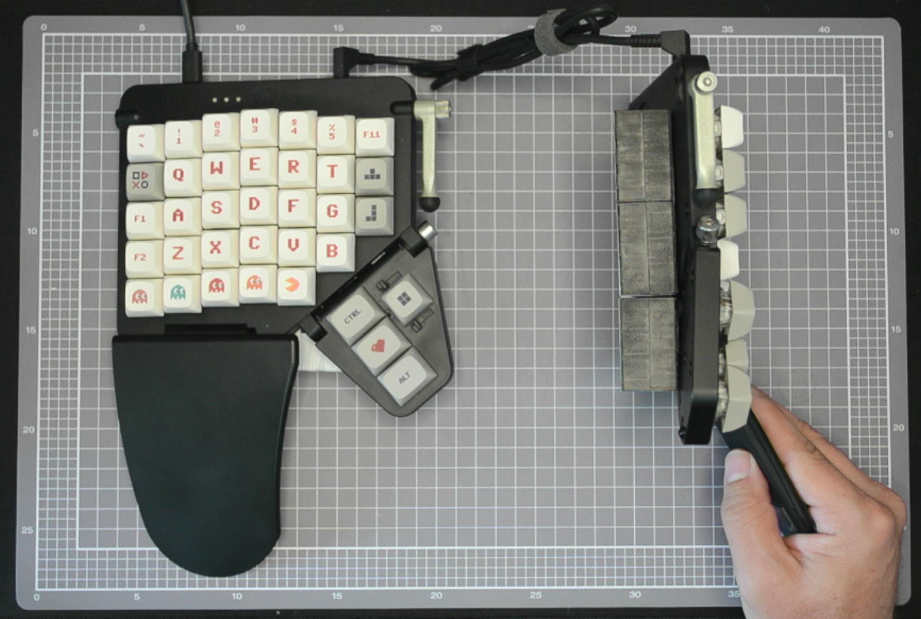
The wedge is 22mm on the high side and puts the keyboard at just the right angle for me as well as being really sturdy (no wobbling).
There is a mounting plate on the underside of the keyboard that allows you to attach it to things. In the future, I am planning on 3D printing a wedge in the exact shape of the boards to attach to the mounting plate.
Keys
Keys on the Moonalder can be remapped and can also do more than a single action. ZSA has an online configuration tool which makes it super simple to remap keys and configure multiple layers.
Actions
Multiple actions you can be assigned to a key based on how it is pressed. For example, you can set the "a" key to a little "a" when tapped and a capital "A" when held . There are also actions for double tap and tapped and then held .
I mostly use the tapped option, but use held to activate a layer.
Macros
Macros allow you to assign multiple key combination to a single key press.
Layout
I have my key layout in QWERTY style. I am alot of things, and one of them is too old to learn a totally new keyboard layout. I also have to use a regular keyboard from time to time so want things to feel as natural a possible when moving between my laptop and Moonlander keyboard.
Getting to this layout has been an iterative process. I am pretty happy with it at the moment and will continue to adjust it as necessary.
Layers
You can configure up to 32 layers of key layouts. Potentially having one for work, one for gaming or a certain application, and many more to meet your particular needs.
I try to keep it simple and have 3 layers that I use. The primary goal of these layers is to reduce the amount of hand movement and finger stretching, thus reducing overall hand strain and increasing efficiency.
In the pictures below, the key colours have the following meaning:
- White - When tapped
- Green - When Held
- Purple - Macro when tapped
Layer 0
This is the default active layer. I tried to keep it as close to QWERTY as possible with the limited number of keys that are available.
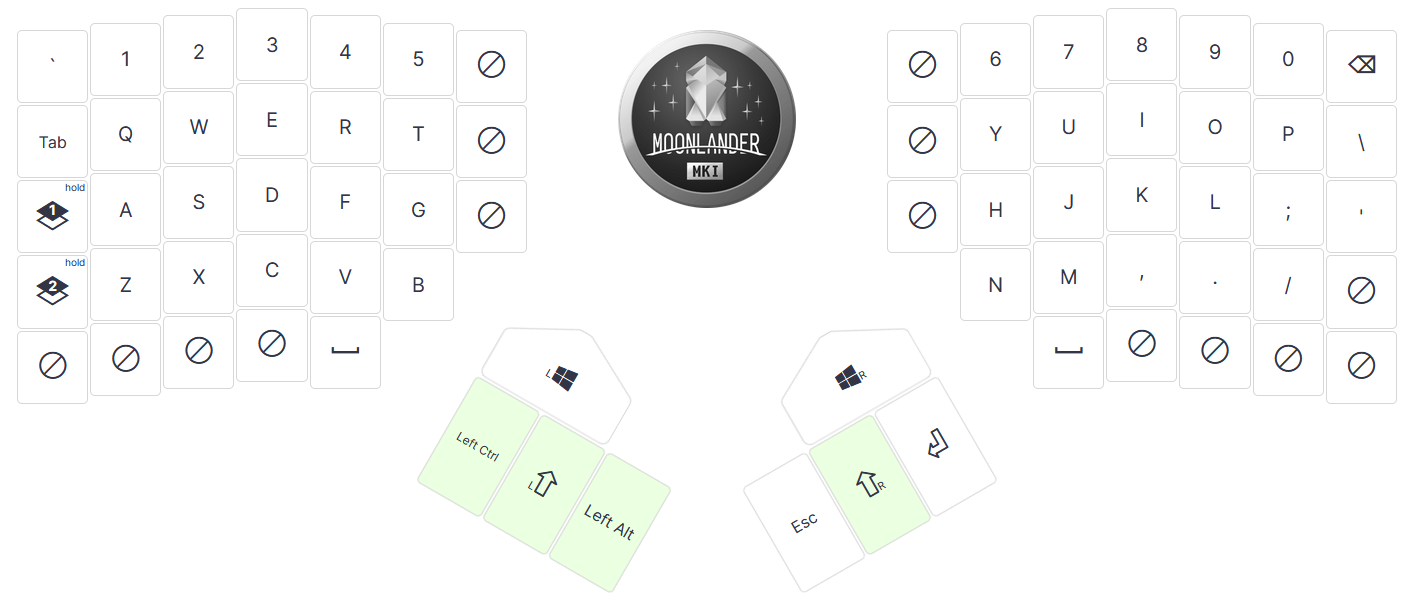
I have CTRL , SHIFT and ALT on the left thumb module which allows me to press either CTRL and SHIFT or Shift and ALT with one thumb.
It's a similar philosophy on the right thumb module.
The layer 1 and layer 2 keys on the left are used to activate to the respective layers when held. When released the active layer is returned to layer 0.
Layer 1
On this layer, I have mostly macros for hard to type often used programming syntax and some VIM shortcuts. I activate this layer by holding the layer 1 key.
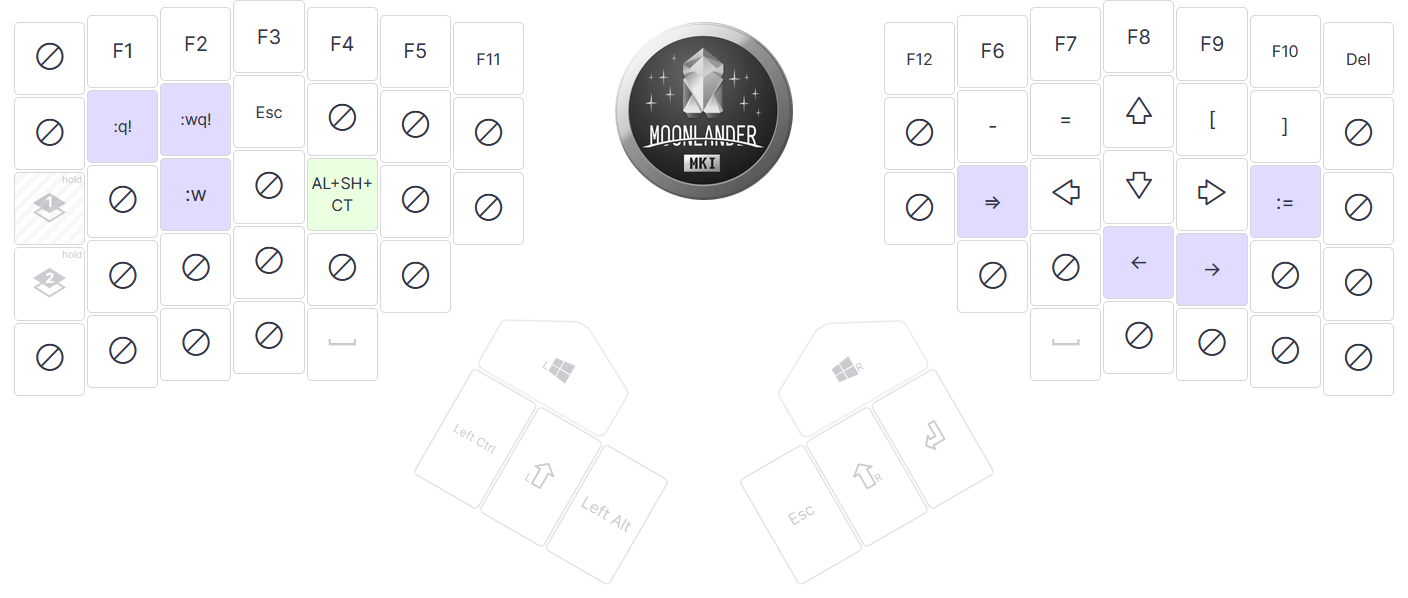
Mapped Keys
- :q! - Exit VIM without saving
- :wq! - Save and exit VIM
- :w - Save file in VIM without exiting
- Esc - Easier to reach Escape key
- AL+SH+CT - ALT , SHIFT and CRTL together
- => - Hash rocket
- <- - Backwards arrow
- -> - Forwards arrow (Often used to define return types)
- := - Walrus Operator
I try to put these keys in positions that make sense and are mentally easy to remember, for example: :q! is over the q key and => is over the h key.
I also have the Up , Down , Left and Right arrows mapped to the keys in the i , j , k and l positions. This allows me to use the arrow keys without having to move my hands.
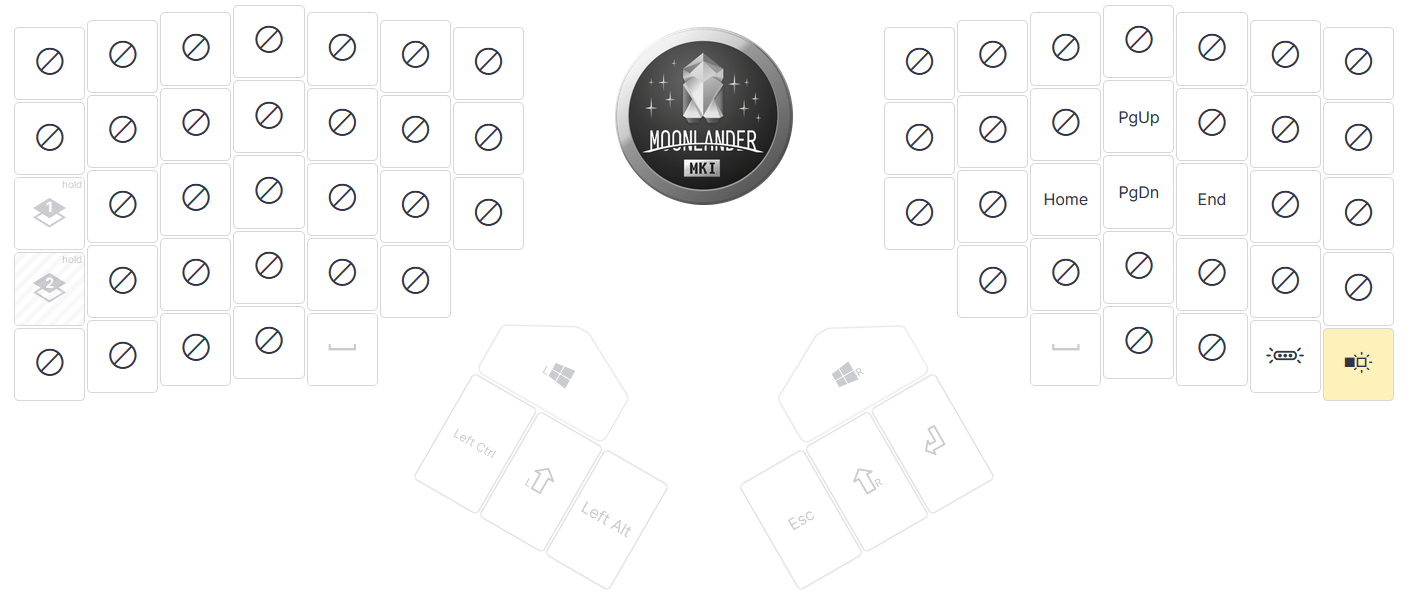
Layer 2
This layer is very minimal. I activate this layer by holding the layer 2 key.
I have the PgUp , PgDn , Home and End keys at the same position as the arrow keys from layer 1 which means I don't have to think about where they are or look down to find them.
The keys on the bottom right toggle the lights on the keyboard on/off.
Cost
So what does this fancy keyboard cost? Are you sitting down? The answer is, it is not exactly cheap at $365 USD (about $500 AUD). I also added keycaps ($55 AUD) and key switches ($135 AUD). The monitary cost is pretty high.
However! The build quality is excellent and the productivity and health benefits I get from this keyboard out weight the cost in dollars, so for me it was a worthwhile investment.
Outro
I felt like I was taking a leap of faith when I ordered the Moonlander because it is so different from all the other keyboards that I have ever used and the cost is relatively high.
Saying that, I do love the Moonlander, it's a great keyboard and I have found my posture and ability to work comfortably for longer has improved since using it. In my case, totally worthwhile.
If you are thinking about getting a Moonlander, hopefully this post has given you some ideas about what it is like to use as a daily driver.