Juniper vSRX3.0 Vagrant Libvirt Box Install
updated: 31st of December 2018
published: 20th of December 2018
Intro
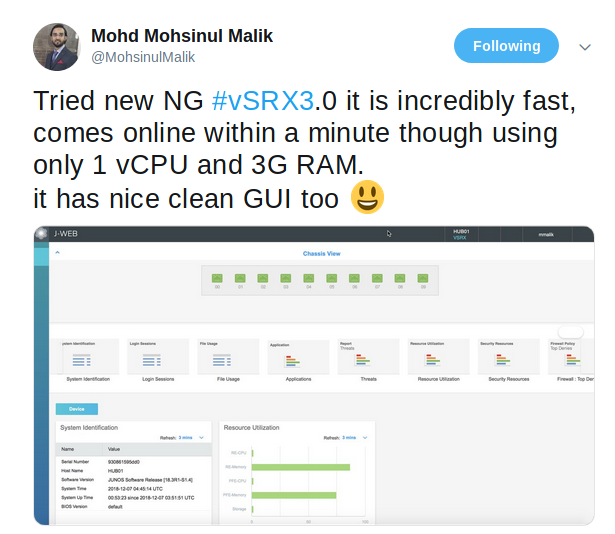
In this post I will build a Juniper vSRX3.0 for use with the vagrant-libvirt provider. What is the vSRX3.0 you ask? Good question! The first I heard about it was from @MohsinulMalik on the Twitters.
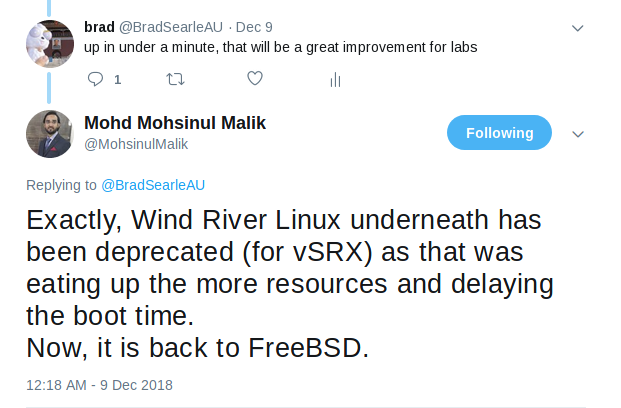
Back to a FreeBSD image a la; no nested Windriver Linux, fast boot time and low CPU and RAM usage! I was intrigued so I set out on a journey to massage a Vagrant box out of this mythical vSRX3.0.
I could not find out much about it from the Juniper website apart form some vague references in some release notes. After much pain and suffering and over two days of searching the Juniper website frantically, I concluded that the vSRX3.0 was not available for download. Defeated, I was.
Then I did what I should have done on the first day and asked a college of mine if they were able to speak with our Juniper account team. Well that paid dividends and within a couple of hours they were able to get an OVA copy for use in our lab. So now onto the lab.
Environment
For reference the following software will be used in this post.
- Juniper vSRX - 18.3R1-S1.4
- Vagrant - Vagrant 2.2.2
- vagrant-libvirt - 0.0.45
- Ubuntu - 1604
Download
To save people the pain and suffering I went through to get this image, I have uploaded the image to thepiratebay ..... That was a joke people! Reach out to your Juniper account team.
Install
Create and change into directory for the vSRX files. I like to keep my custom vagrant boxes under ~/vagrant/boxes/ .
mkdir -p ~/vagrant/boxes/juniper/vsrx/18.3R1-S1.4
cd ~/vagrant/boxes/juniper/vsrx/18.3R1-S1.4Copy the ova file to the ~/vagrant/boxes/juniper/vsrx/18.3R1-S1.4 directory.
cp ~/junos-vsrx-x86-64-18.3R1-S1.4.ide.ova .Next we need to extract the OVA to access the VMDK disk.
tar xvf junos-vsrx-x86-64-18.3R1-S1.4.ide.ova

# output

junos-vsrx-x86-64.ide.ovf
junos-vsrx-x86-64.ide.mf
junos-vsrx-x86-64.ide-disk1.vmdk
Now convert the VMDK to QCOW2 format.
qemu-img convert -f vmdk -O qcow2 junos-vsrx-x86-64.ide-disk1.vmdk junos-vsrx-x86-64.ide-disk1.qcow2Next create a directory named iso_dir for the bootstrap configuration.
mkdir iso_dirCreate a bootstrap configuration file named juniper.conf
tee iso_dir/juniper.conf > /dev/null << "EOF"
system {
    login {
        user vagrant {
            uid 2000;
            class super-user;
            authentication {
                encrypted-password "$6$QiBkxU5N$QY11GzNuFs1sfY0OAacyJ/0WFmP9ciovUAmM425yYAo9OjccxvjWlEZNo8SeqCQxYeM86cfd9V.N1RiiHW2zN0"; ## SECRET-DATA
                ssh-rsa "ssh-rsa AAAAB3NzaC1yc2EAAAABIwAAAQEA6NF8iallvQVp22WDkTkyrtvp9eWW6A8YVr+kz4TjGYe7gHzIw+niNltGEFHzD8+v1I2YJ6oXevct1YeS0o9HZyN1Q9qgCgzUFtdOKLv6IedplqoPkcmF0aYet2PkEDo3MlTBckFXPITAMzF8dJSIFo9D8HfdOV0IAdx4O7PtixWKn5y2hMNG0zQPyUecp4pzC6kivAIhyfHilFR61RGL+GPXQ2MWZWFYbAGjyiYJnAmCP3NOTd0jMZEnDkbUvxhMmBYSdETk1rRgm+R4LOzFUGaHqHDLKLX+FIPKcF96hrucXzcWyLbIbEgE98OHlnVYCzRdK8jlqm8tehUc9c9WhQ== vagrant insecure public key"; ## SECRET-DATA
            }
        }
    }
    root-authentication {
        encrypted-password "$1$nq.N1UsY$JxA/ESAj3KuXseXE597gg0"; ## SECRET-DATA
        ssh-rsa "ssh-rsa AAAAB3NzaC1yc2EAAAABIwAAAQEA6NF8iallvQVp22WDkTkyrtvp9eWW6A8YVr+kz4TjGYe7gHzIw+niNltGEFHzD8+v1I2YJ6oXevct1YeS0o9HZyN1Q9qgCgzUFtdOKLv6IedplqoPkcmF0aYet2PkEDo3MlTBckFXPITAMzF8dJSIFo9D8HfdOV0IAdx4O7PtixWKn5y2hMNG0zQPyUecp4pzC6kivAIhyfHilFR61RGL+GPXQ2MWZWFYbAGjyiYJnAmCP3NOTd0jMZEnDkbUvxhMmBYSdETk1rRgm+R4LOzFUGaHqHDLKLX+FIPKcF96hrucXzcWyLbIbEgE98OHlnVYCzRdK8jlqm8tehUc9c9WhQ== vagrant insecure public key"; ## SECRET-DATA
    }
    host-name vsrx;
    services {
        ssh {
            root-login allow;
        }
        netconf {
            ssh;
        }
    }
    syslog {
        user * {
            any emergency;
        }
        file messages {
            any any;
            authorization info;
        }
        file interactive-commands {
            interactive-commands any;
        }
    }
    license {
        autoupdate {
            url https://ae1.juniper.net/junos/key_retrieval;
        }
    }
}
security {
    forwarding-options {
        family {
            inet6 {
                mode packet-based;
            }
            mpls {
                mode packet-based;
            }
        }
    }
}
interfaces {
    fxp0 {
        unit 0 {
            family inet {
                dhcp;
            }
        }
    }
}
EOF
Create an iso image named bootstrap.iso .
mkisofs -l -o bootstrap.iso iso_dir

# output

I: -input-charset not specified, using utf-8 (detected in locale settings)
Total translation table size: 0
Total rockridge attributes bytes: 0
Total directory bytes: 116
Path table size(bytes): 10
Max brk space used 0
175 extents written (0 MB)I first tried booting the image with 1 CPU and 3Gig of RAM and it did boot but there where no data interfaces. A peek inside the junos-vsrx-x86-64.ide.ovf file reveals that the image should use 2 CPUs and 4Gig of RAM. Lets boot up the vSRX3.0 image and make sure its all working as expected.
virt-install \
    --name vsrx \
    --cpu host \
    --vcpus=2 \
    --os-variant=freebsd10 \
    --hvm \
    --arch=x86_64 \
    --ram 4096 \
    --disk path=junos-vsrx-x86-64.ide-disk1.qcow2,size=19,device=disk,bus=ide,format=qcow2 \
    --disk path=bootstrap.iso,device=cdrom,bus=ide \
    --boot hd \
    --network=network:vagrant-libvirt,model=virtio \
    --graphics none \
    --import
A virtual console will be connected to the VM and you will be able to see the VM boot up. Once the VM is booted login with the username vagrant and password Vagrant and check the IP address assigned to the fxp0.0 interface.
FreeBSD/amd64 (vsrx) (ttyu0)

login: vagrant
Password:

--- JUNOS 18.3R1-S1.4 Kernel 64-bit XEN JNPR-11.0-20181108.217da31_buil
root@vsrx> show interfaces terse | match fxp0.0

# output

fxp0.0                  up    up   inet     192.168.121.138/24
From another host terminal confirm that it is possible to SSH to the VM with the Vagrant insecure_private_key .
# from host shell

ssh vagrant@192.168.121.138 -i ~/.vagrant.d/insecure_private_key

# now logged into guest vsrx

--- JUNOS 18.3R1-S1.4 Kernel 64-bit XEN JNPR-11.0-20181108.217da31_buil
vagrant@vsrx>
If you can successfully SSH to the vSRX with the Vagrant insecure_private_key its time to package the VM into a Vagrant box. First shutdown the VM.
request system power-off

# output

Power Off the system ? [yes,no] (no) yes


*** FINAL System shutdown message from vagrant@vsrx ***

System going down IMMEDIATELY
If the console does not automatically disconnect use the following key combination.
Press and hold CTRL and SHIFT while pressing 6 then ] .
Create a metadata.json file.
tee metadata.json > /dev/null << "EOF"
{"provider":"libvirt","format":"qcow2","virtual_size":19}
EOF
The maintainers of the vagrant-libvirt plugin have a script that can be used to convert qcow2 images to a vagrant box. Download the libvirt conversion script.
curl -O https://raw.githubusercontent.com/vagrant-libvirt/vagrant-libvirt/master/tools/create_box.shUse the create_box.sh script to make a Vagrant box from the qcow2 image.
bash create_box.sh junos-vsrx-x86-64.ide-disk1.qcow2

# output

{19}
==> Creating box, tarring and gzipping
./metadata.json
./Vagrantfile
./box.img
Total bytes written: 984268800 (939MiB, 21MiB/s)
==> junos-vsrx-x86-64.ide-disk1.box created
==> You can now add the box:
==>   'vagrant box add junos-vsrx-x86-64.ide-disk1.box --name junos-vsrx-x86-64.ide-disk1'
Create a metadata file called vsrx.json so that the box is added with the correct version number.
tee vsrx.json > /dev/null << "EOF"
{
  "name": "juniper/vsrx-packetmode",
  "description": "Juniper vSRX Packet Mode",
  "versions": [
    {
      "version": "18.3R1-S1.4",
      "providers": [
        {
          "name": "libvirt",
          "url": "file:///home/bradmin/vagrant/boxes/juniper/vsrx/18.3R1-S1.4/junos-vsrx-x86-64.ide-disk1.box"
        }
      ]
    }
  ]
}
EOF
Add the box to Vagrant using the vsrx.json file.
vagrant box add vsrx.json

# output

==> box: Loading metadata for box 'vsrx.json'
    box: URL: file:///home/bradmin/vagrant/boxes/juniper/vsrx/18.3R1-S1.4/vsrx.json
==> box: Adding box 'juniper/vsrx-packetmode' (v18.3R1-S1.4) for provider: libvirt
    box: Unpacking necessary files from: file:///home/bradmin/vagrant/boxes/juniper/vsrx/18.3R1-S1.4/junos-vsrx-x86-64.ide-disk1.box
==> box: Successfully added box 'juniper/vsrx-packetmode' (v18.3R1-S1.4) for 'libvirt'!
Confirm the vsrx box was added successfully.
vagrant box list

# output

CumulusCommunity/cumulus-vx   (libvirt, 3.6.0)
.
. <snip>
.
juniper/vsrx                  (libvirt, 12.1X47-D15.4)
juniper/vsrx-packetmode       (libvirt, 18.3R1-S1.4)
Vagrantfile
Use this Vagrantfile to test out the new vSRX Vagrant box.
# -*- mode: ruby -*-
# vi: set ft=ruby :

cwd = Dir.pwd.split("/").last
username = ENV['USER']
domain_prefix = "#{username}_#{cwd}"

Vagrant.require_version ">= 2.1.0"
Vagrant.configure("2") do |config|

  config.vm.define "fw01" do |node|
    guest_name = "fw01"
    node.vm.box = "juniper/vsrx-packetmode"
    node.vm.box_version = "18.3R1-S1.4"
    node.vm.guest = :tinycore
    node.vm.synced_folder ".", "/vagrant", id: "vagrant-root", disabled: true

    node.ssh.insert_key = false

    # Limit CPU once Box has finished booting.
    node.trigger.after :up do |trigger|
      trigger.name = "Finished Message"
      trigger.info = "Machine is up! : #{domain_prefix}_#{guest_name}"
      trigger.run = {inline: "virsh schedinfo #{domain_prefix}_#{guest_name} --set vcpu_quota=35000"}
    end

    node.vm.provider :libvirt do |domain|
      domain.default_prefix = "#{domain_prefix}"
      domain.cpus = 2
      domain.memory = 4096
      domain.disk_bus = "ide"
    end

  end
endTesting
Lets vagrant up and make sure we can connect to the vSRX.
vagrant up

# output

Bringing machine 'fw01' up with 'libvirt' provider...
==> fw01: Checking if box 'juniper/vsrx-packetmode' is up to date...
==> fw01: Uploading base box image as volume into libvirt storage...
==> fw01: Creating image (snapshot of base box volume).
==> fw01: Creating domain with the following settings...
==> fw01:  -- Name:              bradmin_vsrx-test_fw01
==> fw01:  -- Domain type:       kvm
==> fw01:  -- Cpus:              2
==> fw01:  -- Feature:           acpi
==> fw01:  -- Feature:           apic
==> fw01:  -- Feature:           pae
==> fw01:  -- Memory:            4096M
==> fw01:  -- Management MAC:
==> fw01:  -- Loader:
==> fw01:  -- Nvram:
==> fw01:  -- Base box:          juniper/vsrx-packetmode
==> fw01:  -- Storage pool:      default
==> fw01:  -- Image:             /var/lib/libvirt/images/bradmin_vsrx-test_fw01.img (19G)
==> fw01:  -- Volume Cache:      default
==> fw01:  -- Kernel:
==> fw01:  -- Initrd:
==> fw01:  -- Graphics Type:     vnc
==> fw01:  -- Graphics Port:     -1
==> fw01:  -- Graphics IP:       127.0.0.1
==> fw01:  -- Graphics Password: Not defined
==> fw01:  -- Video Type:        cirrus
==> fw01:  -- Video VRAM:        9216
==> fw01:  -- Sound Type:
==> fw01:  -- Keymap:            en-us
==> fw01:  -- TPM Path:
==> fw01:  -- INPUT:             type=mouse, bus=ps2
==> fw01: Creating shared folders metadata...
==> fw01: Starting domain.
==> fw01: Waiting for domain to get an IP address...
==> fw01: Waiting for SSH to become available...
==> fw01: Configuring and enabling network interfaces...
==> fw01: Running triggers after up ...
==> fw01: Running trigger: Finished Message...
==> fw01: Machine is up! : bradmin_vsrx-test_fw01
    fw01: Running local: Inline script
    fw01: virsh schedinfo bradmin_vsrx-test_fw01 --set vcpu_quota=35000
    fw01: Scheduler      : posix
    fw01: cpu_shares     : 1024
    fw01: vcpu_period    : 100000
    fw01: vcpu_quota     : 35000
    fw01: emulator_period: 100000
    fw01: emulator_quota : -1
Now SSH into vSRX.
# from host shell

vagrant ssh

# now in vSRX shell

Last login: Thu Dec 20 05:04:12 2018 from 192.168.121.1
--- JUNOS 18.3R1-S1.4 Kernel 64-bit XEN JNPR-11.0-20181108.217da31_buil
vagrant@vsrx> show version
Hostname: vsrx
Model: vSRX
Junos: 18.3R1-S1.4
Now that we are able to connect, exit out and lets clean up the box.
# from host shell

vagrant destroy -f

# output

==> rt01: Removing domain...
Remove the original KVM image.
rm -f junos-vsrx-x86-64.ide-disk1.qcow2
virsh undefine vsrx

# output

Domain vsrx has been undefined
Outro
The vSRX3.0 brings me hope. The boot up time on my lab server with SSD drives is around 3 minutes which is significantly faster than its 2.0 counterparts. The resource utilization of 2 CPUs and 4 Gig RAM while not the lowest is definitely not the highest. 100% CPU is not really a show stopper for a lab considering the workaround is pretty seamless. The advantage of this VM over say the vMX is that it only requires 1 VM and supports many more interfaces. All in all a pretty good showing and I am looking forward to future releases. Lets also hope the vMX and vQFX also follow suit.