Install an Ubuntu 1804 VM on Hyper-V as a Vagrant Server
published: 18th of August 2020
Intro
Readers of my blog will probably have noticed that I like to use Vagrant for development and testing. I recently switched to using Windows and found the Hyper-V provider for Vagrant to be a bit limited. In this post I will install an Ubuntu 1804 VM on Hyper-V for use as a Vagrant server so that I can maintain my usual development/testing workflow.
Software Used In This Post
- Windows 10 Pro - 19041.388
- Ubuntu - 1804.05
- Vagrant - 2.2.9
- Vagrant-libvirt - 0.1.2
Pre-Flight Check
This post assumes that you already have Hyper-V enabled and ready to use. The host must also have an Intel processor with VT-x and EPT technology enabled in the BIOS.
Additionally have an installer ISO from Ubuntu downloaded and ready to use. You can find the version used in this post here .
Create V-Switch
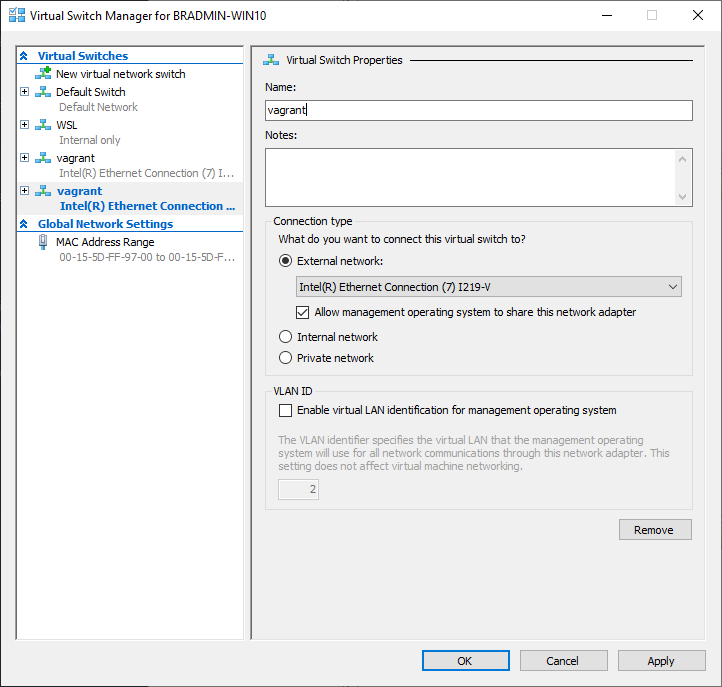
In this setup I will be creating a v-switch that is bridged to my physical network adapter. This will allow me to access the VM as if it was connected to my phyical LAN.
I am naming the v-switch vagrant . Select External Network and choose the desired adapter from the list. Also tick the box to Allow management operating system to share this network adapter. Then click OK
Create Ubuntu 1804 VM
Next up we can create an Ubuntu 1804 VM. In order to use a Linux VM with nested virtualization the VM must be configured according to the following parameters
- VM configuration version 8.0 or greater
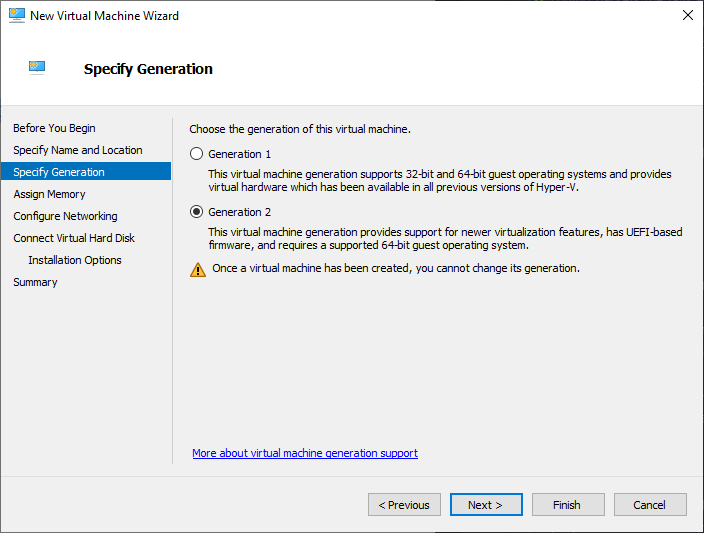
- The VM must be of the type Generation 2
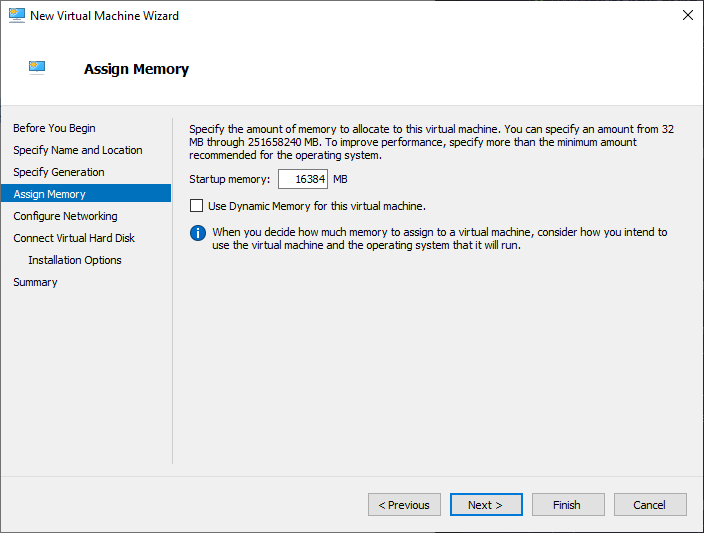
- The VM cannot use Dynamic Memory
- Disable Secure Boot on the VM
Create VM Parameters
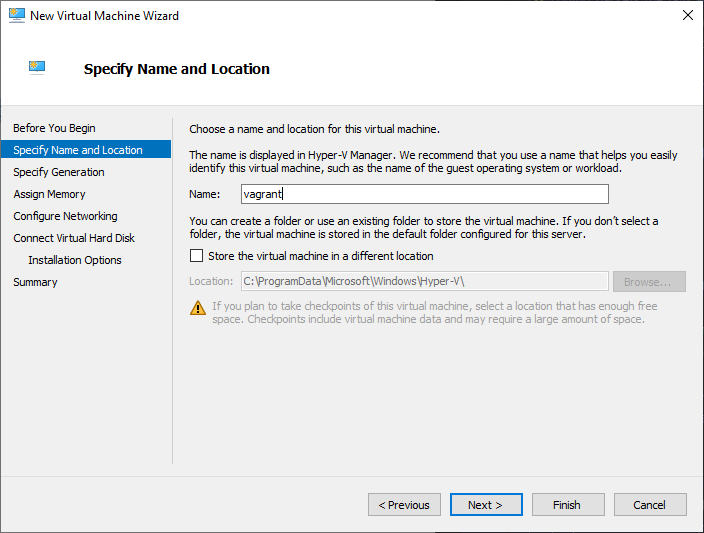
Specify the VM name and click Next >
Ensure that you select Generation 2 and click Next >
Assign the amount of Memory required for the VM. Ensure that you un-tick the box to Use Dynamic Memory for this virtual machine and click Next >
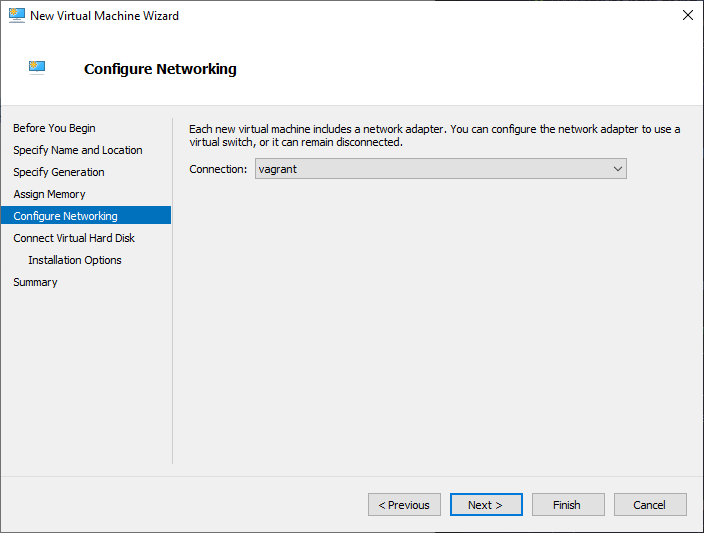
Select the previously created vagrant network and click Next > .
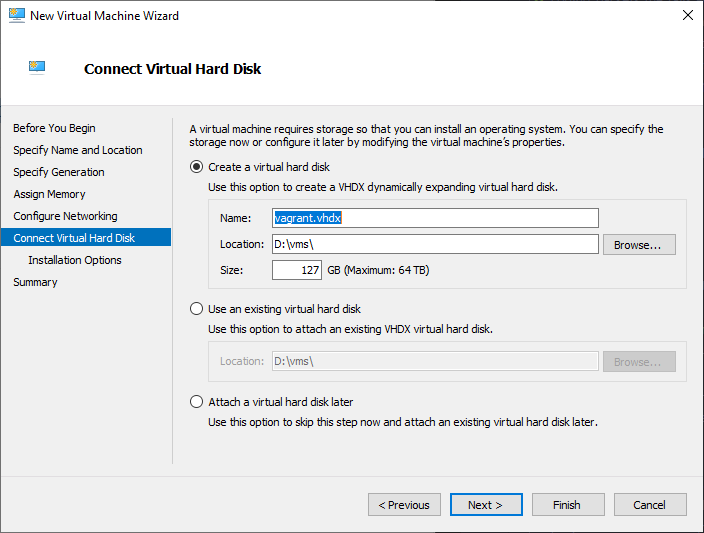
Create a virtual hard disk, specifying the size of the disk and click Next > .
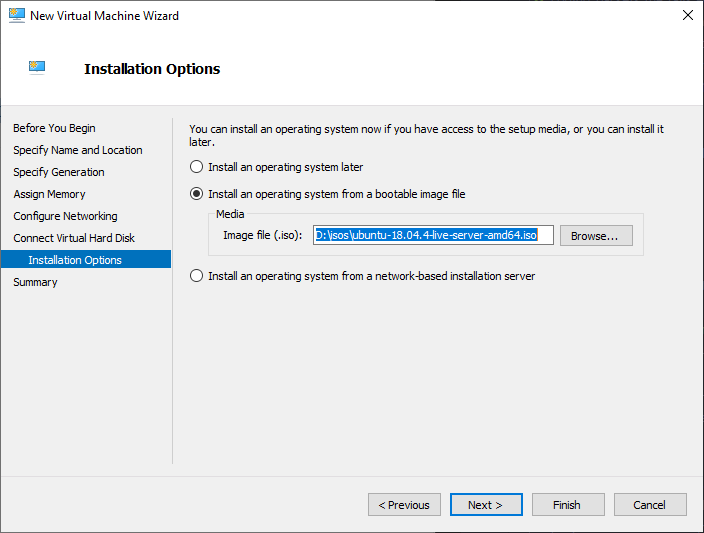
Select the Install an operating system from a bootable image file option and browse to where you downloaded the ISO and click Next > .
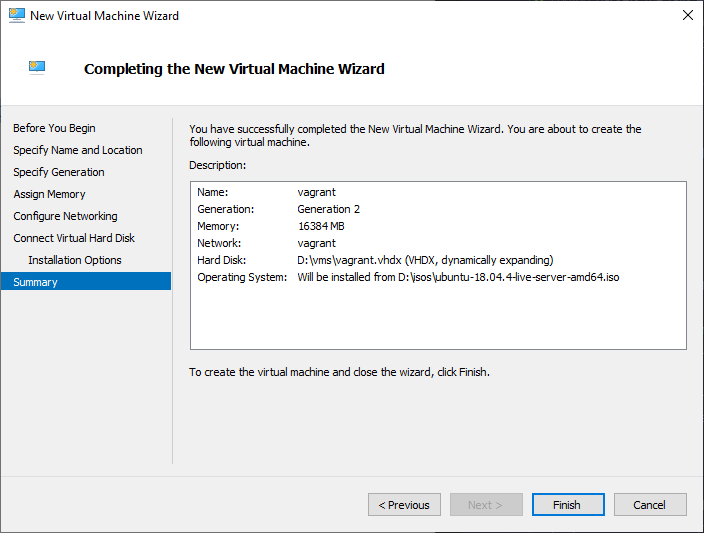
Assuming that you are happy with everything click Finish .
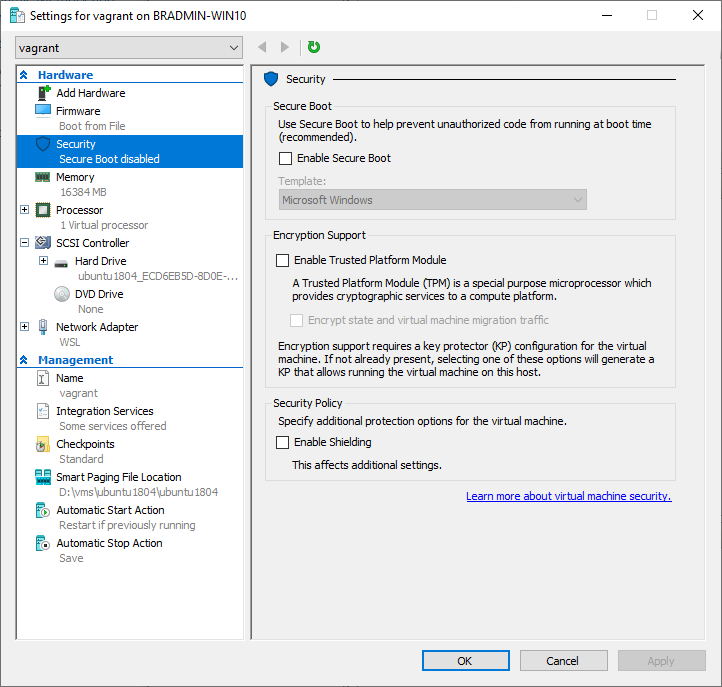
Disable Secure Boot
Browse to the VM and disable secure boot.
Un-tick the Enable Secure Boot check box and click OK .
Install Ubuntu 1804
I wont cover the whole installation process as it is pretty straight forward. When you get to the network connections section set a static IP according to your LAN settings. The below screen shot is an example.

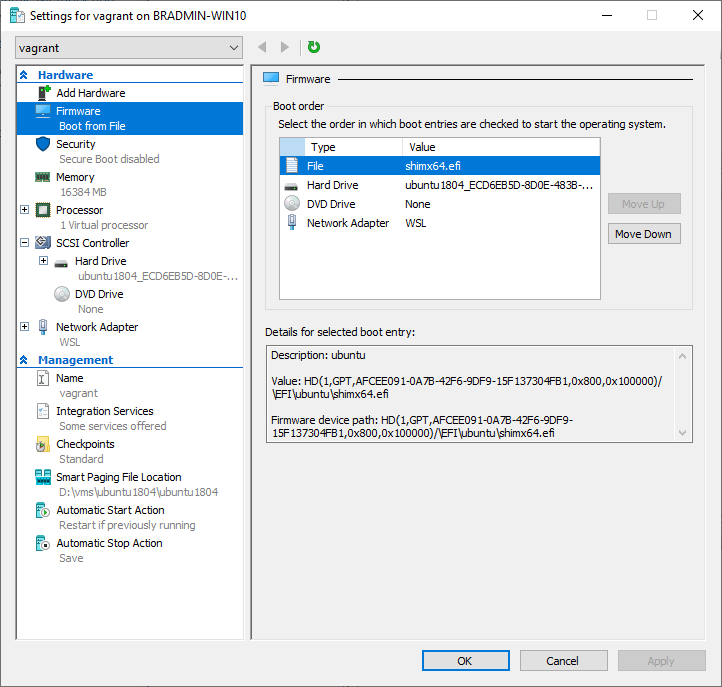
Edit Boot Order
Once the installation is complete, power off the VM and edit the boot order moving the hard drive above the DVD Drive and click OK.
Eject ISO
Under click Media select the None option and click OK .
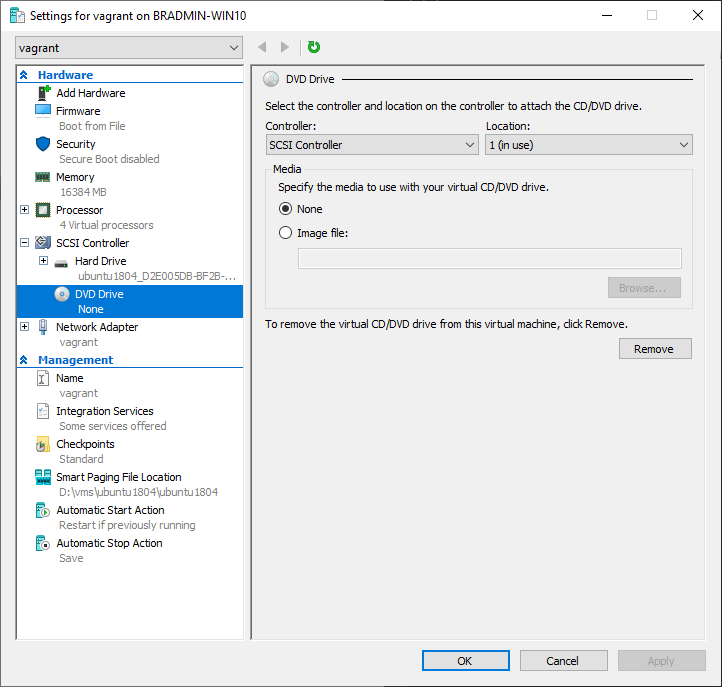
OK, with that step completed we have an Ubuntu 1804 VM installed on Hyper-V. Next up we need to enable nested virtualization.
Enable Nested Virtualization
In order to run a hypervisor on the Ubuntu VM we need to enable nested virtualization for the VM. The process to do that is covered in detail in this blog post.
TL/DR; While the VM is powered off, open a powershell terminal as Administrator and run the following command.
Set-VMProcessor -VMName vagrant -ExposeVirtualizationExtensions $trueEnable nested virtualization before proceeding.
Install Vagrant
The process to install Vagrant is kind of long so I wont repeat it in this post. Please follow along with this post to install Vagrant with the Libvirt provider on Ubuntu 1804.
Windows Terminal Integration
For bonus points we will configure a connection profile for windows terminal so we can very easily connect to our Vagrant VM.
We will be using the WSL2 instance as a jump host to get to our Vagrant VM. Firstly we need to setup WSL2 so you can SSH to the Vagrant VM without having to use a password.
Create RSA keys on your WSL2 instance with the ssh-keygen command.
# WSL2 Instance

ssh-keygen

# output

Generating public/private rsa key pair.
Enter file in which to save the key (/home/bradmin/.ssh/id_rsa):
Enter passphrase (empty for no passphrase):
Enter same passphrase again:
Your identification has been saved in /home/bradmin/.ssh/id_rsa.
Your public key has been saved in /home/bradmin/.ssh/id_rsa.pub.
The key fingerprint is:
SHA256:aW4/dChrxpo6GPSF5UWWpTdXhIn8SY5TuvSdkex0B7M bradmin@vagrant
The keys randomart image is:
+---[RSA 2048]----+
|       .o+.. +o  |
|      ..o.o =.o  |
|     + .. oB.o = |
|  . . o  o=o+ E o|
| . . .  S. = + +.|
|  . .  o. + o +  |
|   o   .o+ .     |
|  . .  o=..      |
|    .oo+  ..     |
+----[SHA256]-----+
Now we copy our SSH keys to the Vagrant VM with the ssh-copy-id command.
# WSL2 Instance

ssh-copy-id 192.168.144.144

# output

/usr/bin/ssh-copy-id: INFO: Source of key(s) to be installed: "/home/bradmin/.ssh/id_rsa.pub"
/usr/bin/ssh-copy-id: INFO: attempting to log in with the new key(s), to filter out any that are already installed
/usr/bin/ssh-copy-id: INFO: 1 key(s) remain to be installed -- if you are prompted now it is to install the new keys
bradmin@192.168.144.144s password:

Number of key(s) added: 1

Now try logging into the machine, with:   "ssh 192.168.144.144"
and check to make sure that only the key(s) you wanted were added.
Next up, in the Windows Terminal settings under the profiles section key add the following stanza to create a connection profile.
{
  "name":  "Vagrant VM",
  "tabTitle": "Vagrant VM",
  "commandline": "wsl.exe ssh 192.168.144.144",
  // Optionally add an icon.
  "icon": "C:/Users/bradl/Pictures/vagrant.png"
},
The commandline parameter tells Windows Terminal to open a WSL shell and SSH to 192.168.144.144
Optionally you can also add a picture for the VM using the icon parameter. The result will look like the below screenshot.
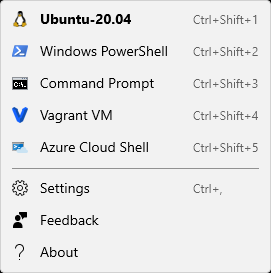
Now to access the VM you just select it from the dropdown and you will be dropped into the Vagrant VM shell.
Outro
In this post I show you how to install an Ubuntu 1804 VM on Hyper-V for use as a Vagrant server and add a connection profile to Windows terminal for our Vagrant VM.
Links
https://github.com/vagrant-libvirt/vagrant-libvirt
https://docs.microsoft.com/en-us/virtualization/hyper-v-on-windows/user-guide/setup-nat-network
https://www.technig.com/connect-hyper-v-machines-to-internet/
https://code.visualstudio.com/docs/remote/ssh
https://www.thomasmaurer.ch/2020/05/how-to-ssh-into-an-azure-vm-from-windows-terminal-menu/