CI/CD For Networking Part 3
published: 26th of February 2018
Intro
Gitlab is an open source platform for collaborating around code development that is managed via Git. Gitlab presents a nice and friendly web interface that makes it easy to view and track the changes made to a code base. Gitlab have a SAAS offering at https://gitlab.com and also release a self hosted version in both enterprise and community supported flavours.
For this part of series I will be using the Gitlab community supported edition. The Gitlab server will be installed on a Centos 7 minimal hosts with the firewall service disabled and SELinux set to permissive.
Install
The hosts in this lab get their management IP addresses via DHCP. An update to the /etc/sysconfig/network-scripts/ifcfg-eth0 file is required to use the labs dnsmasq service.
DEVICE="eth0"
BOOTPROTO="dhcp"
ONBOOT="yes"
TYPE="Ethernet"
PERSISTENT_DHCLIENT="yes"

# add the following

DNS1="192.168.121.120"
PEERDNS=no
Restart the network service.
sudo systemctl restart networkInstall the required packages.
sudo yum install -y epel-release
sudo yum install -y pygpgme yum-utils
Add the Gitlab repo gitlab_gitlab-ce.repo file to the /etc/yum.repos.d/ directory.
# /etc/yum.repos.d/gitlab_gitlab-ce.repo

[gitlab_gitlab-ce]
name=gitlab_gitlab-ce
baseurl=https://packages.gitlab.com/gitlab/gitlab-ce/el/7/$basearch
repo_gpgcheck=1
gpgcheck=1
enabled=1
gpgkey=https://packages.gitlab.com/gitlab/gitlab-ce/gpgkey
       https://packages.gitlab.com/gitlab/gitlab-ce/gpgkey/gitlab-gitlab-ce-3D645A26AB9FBD22.pub.gpg
sslverify=1
sslcacert=/etc/pki/tls/certs/ca-bundle.crt
metadata_expire=300

[gitlab_gitlab-ce-source]
name=gitlab_gitlab-ce-source
baseurl=https://packages.gitlab.com/gitlab/gitlab-ce/el/7/SRPMS
repo_gpgcheck=1
gpgcheck=1
enabled=1
gpgkey=https://packages.gitlab.com/gitlab/gitlab-ce/gpgkey
       https://packages.gitlab.com/gitlab/gitlab-ce/gpgkey/gitlab-gitlab-ce-3D645A26AB9FBD22.pub.gpg
sslverify=1
sslcacert=/etc/pki/tls/certs/ca-bundle.crt
metadata_expire=300
Enable Gitlab repo and update host.
sudo yum -q makecache -y --disablerepo="*" --enablerepo="gitlab_gitlab-ce"
sudo yum update -y
Install gitlab-ce .
sudo yum install -y gitlab-ceConfiguration
Backup the /etc/gitlab/gitlab.rb file.
sudo mv /etc/gitlab/gitlab.rb /etc/gitlab/gitlab.rb.oldCreate an /etc/gitlab/gitlab.rb file with the following contents.
# /etc/gitlab/gitlab.rb

external_url 'https://gitlab.lab.local'
nginx['redirect_http_to_https'] = true
Generate a TLS certificate and a certificate signing request.
cd /etc/ssl/certs/

sudo openssl genrsa -out gitlab.lab.local.key 2048

sudo openssl req -new -key gitlab.lab.local.key \
    -subj "/C=AU/ST=NSW/L=NSW/O=LAB/CN=gitlab.lab.local" \
    -out gitlab.lab.local.csr
Update the gitlab.lab.local.key permissions.
sudo chmod 0400 gitlab.lab.local.keyHave CSR signed by the Root CA then add the signed gitlab.lab.local.crt certificate to the /etc/ssl/certs directory on the gitlab host.
# on the root CA host.

cd /etc/ssl/certs

sudo openssl x509 -req -in gitlab.lab.local.csr \
    -CA ROOTCA.pem -CAkey ROOTCA.key -CAcreateserial \
-out gitlab.lab.local.crt -days 500 -sha256# on the gitlab host.
[vagrant@localhost certs]$ ls /etc/ssl/certs/ | grep gitlab
gitlab.lab.local.crt
gitlab.lab.local.csr
gitlab.lab.local.keyCreate a symlink to the gitlab.lab.local.key and gitlab.lab.local.crt files to the /etc/gitlab/ssl directory.
sudo mkdir -p /etc/gitlab/ssl
sudo chmod 700 /etc/gitlab/ssl
sudo ln -s /etc/ssl/certs/gitlab.lab.local.key  /etc/gitlab/ssl/gitlab.lab.local.key
sudo ln -s /etc/ssl/certs/gitlab.lab.local.crt  /etc/gitlab/ssl/gitlab.lab.local.crt
Reconfigure Gitlab to apply the configuration changes.
sudo gitlab-ctl reconfigureOnce this is done you will need to set a password for the root user. Browse to https://<hostname-or-ip> and configure a password.
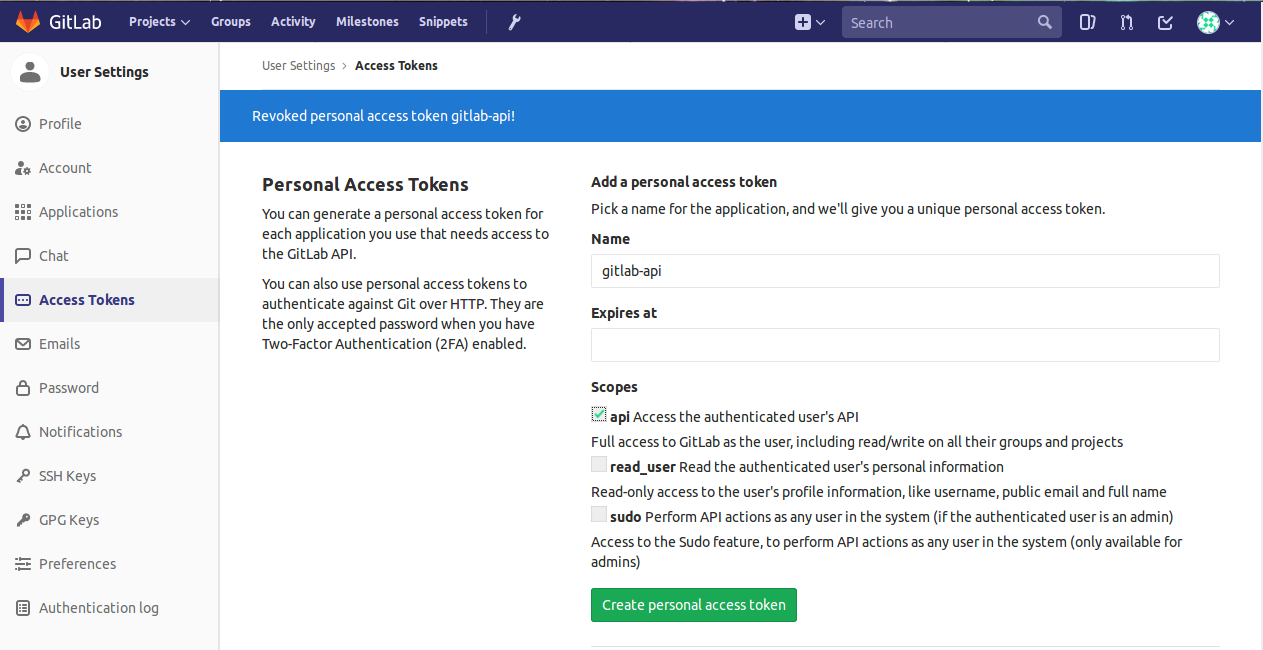
Next, login with the username root and the password you just set and generate a security token to use for API access.
To generate a token browse to: User Icon (Top right) > Settings > Access Tokens
Create a vagrant user with the password Vagrant123 using the API and the access token just generated.
GITLAB_ACCESS_TOKEN=zqKexEe4jrWeg2aBR5bv

curl -k -H "PRIVATE-TOKEN: $GITLAB_ACCESS_TOKEN" \
    --data "email=vagrant@lab.local&name=vagrant&username=vagrant&password=Vagrant123&confirm=false" \
    https://192.168.121.122/api/v3/users/
A successful response looks similar to the below
{"id":2,"name":"vagrant","username":"vagrant","state":"active","avatar_url":"https://secure.gravatar.com/avatar/3270062999aa91fd69f46b48af76fd3b?s=80&d=identicon","web_url":"https://gitlab.lab.local/vagrant","created_at":"2018-02-25T22:23:42.434Z","bio":null,"location":null,"skype":"","linkedin":"","twitter":"","website_url":"","organization":null,"last_sign_in_at":null,"confirmed_at":"2018-02-25T22:23:42.406Z","last_activity_on":null,"email":"vagrant@lab.local","theme_id":1,"color_scheme_id":1,"projects_limit":100000,"current_sign_in_at":null,"identities":[],"can_create_group":true,"can_create_project":true,"two_factor_enabled":false,"external":false}Outro
Now that the Gitlab server is installed lets move onto Part 4 of this series: Jenkins Installation.
Links
https://docs.gitlab.com/omnibus/README.html#installation-and-configuration-using-omnibus-package