AWS S3 Cloudfront Static Website Hosting
updated: 1st of June 2020
published: 9th of May 2020
Intro
I recently migrated my blog to AWS, since it was mostly static content I did not see much point in maintaining at VM and a tech stack just to to host static content. It was overkill. There are a lot of options for hosting a static site these days but since I am currently learning AWS so it makes sense to host it there.
In this post I will go over the process I used to build out the required services and outline some of the gotcha I hit on the way.
AWS Services
AWS has a bajillion services and growing every year. They also have a number of options available for hosting a website. I am using the the following services to host my website;
- Route 53 - DNS registration and management.
- Certificate Manager - Create free TLS certificates for use with AWS services.
- S3 - An object store for static files.
- Cloud Front - A globally distributed content delivery network (CDN).
Domain Name
Firstly some background. I was initially hosting the DNS for codingpackets.com with Godaddy. I was pretty happy with them but there was an issue with redirects and I was getting a certificate error when using a bare domain IE: https://codingpackets.com without the www . IE: https://www.codingpackets.com. This is related to the way S3 works as a website host adding www to the domain and Godaddy's inability to create a DNS alias record. For this reason I transferred the codingpackets.com domain to Route 53.
Before you move onto the next steps it's best to have your domain registered and active with Route 53. There are cheaper alternatives out there, but you don't get the ease of integration that you have with all your eggs in the AWS walled garden. The rest of this post assumes you have your domain registered and ready to go.
S3
Create and S3 Bucket
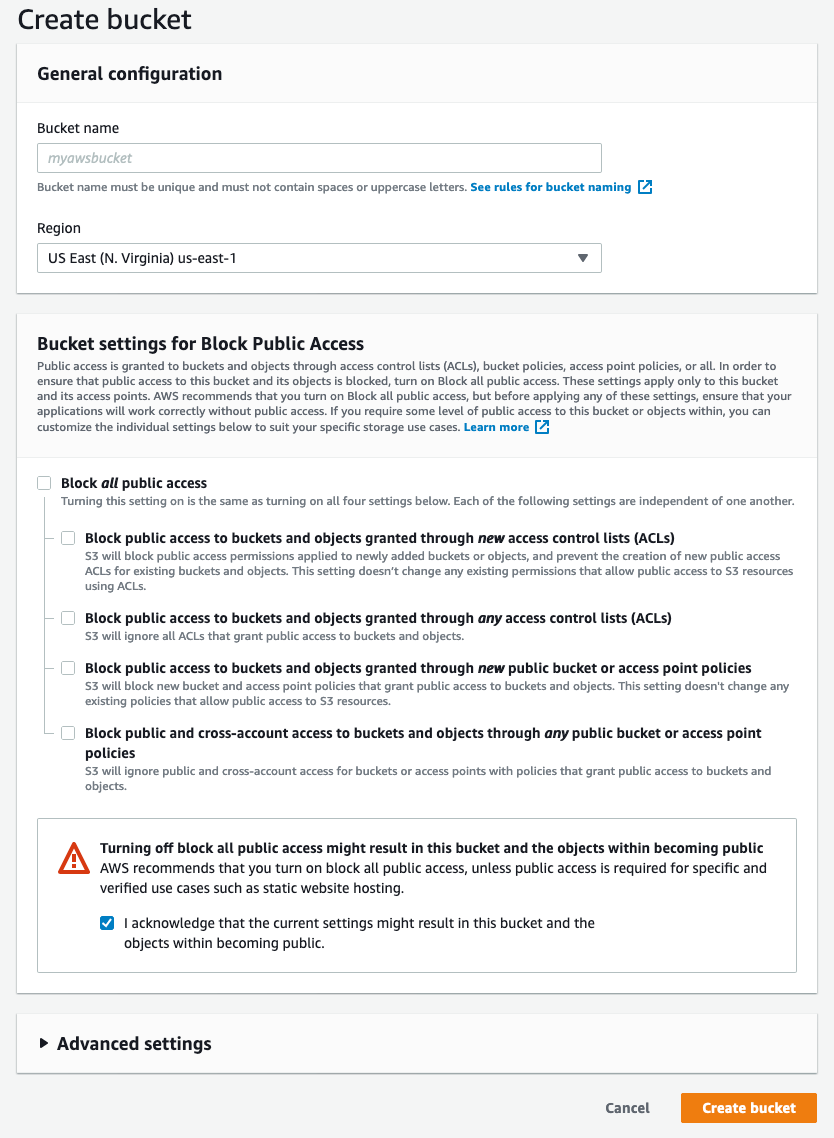
An S3 bucket will be used to store the sites content IE: HTML, CSS, JS and image files. To create a bucket navigate to:
Enter the Bucket name , untick the Block all public access checkbox and tick the acknowledge warning. Then click on Create bucket button.
Apply Bucket Policy
Next up apply permission to the bucket with a bucket policy. Navigate to:
The bucket needs to be publicly accessible since people could be coming to your site from anywhere on the internet. Paste in the following code snippet replacing the ARN with the ARN for your bucket.
{
    "Version": "2012-10-17",
    "Statement": [
        {
            "Sid": "PublicReadGetObject",
            "Effect": "Allow",
            "Principal": "*",
            "Action": "s3:GetObject",
            "Resource": "arn:aws:s3:::<bucket-arn>/*"
        }
    ]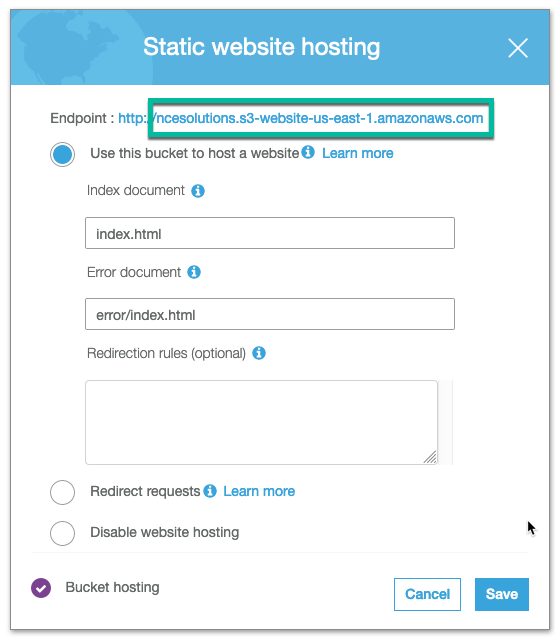
}Enable Static Website Hosting
Now enable the bucket to act as static website host by navigating to:
Select the Use this bucket as a website button and enter the name of the Index document and Error document then click the save button.
Upload Content to S3 Bucket
Assuming you have generated your static site already you can upload the content to S3. I use the aws S3 sync from the AWS CLI tool. My static files are stored in the _site directory.
aws s3 sync _site/ s3://<bucket-name>You can now navigate to the HTTP endpoint from the previous step to verify that your content is accessible.
Certificate Manager
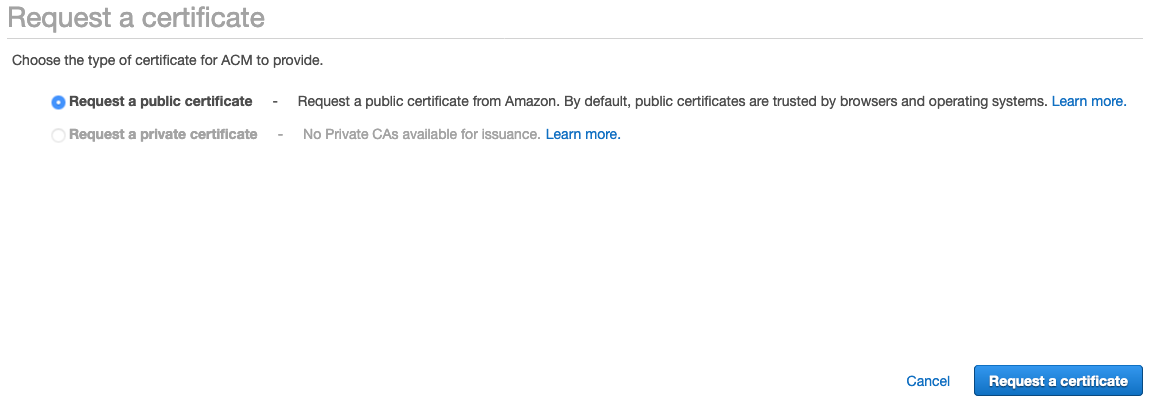
Request a Certificate
Now lets generate a TLS certificate so that our site can be accessed securely over HTTPS . Navigate to:
Select the Request a public certificate radio button and press the Request a certificate button.
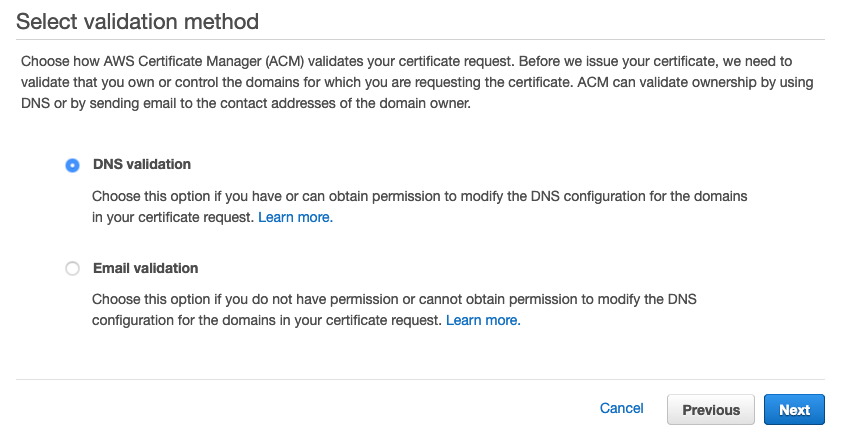
On the next screen enter the domain names you wish to have a certificate generated for. Enter both the bare domain and the domain with the www and press the Next button.

Select the DNS validation radio button and press the Next button.
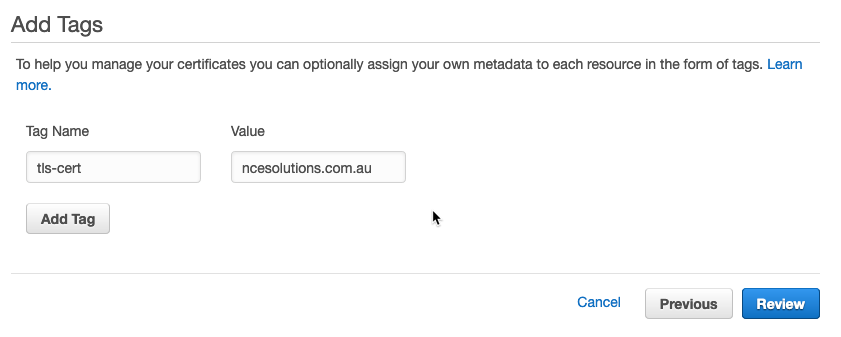
Enter tags if you wish and press the Review button.
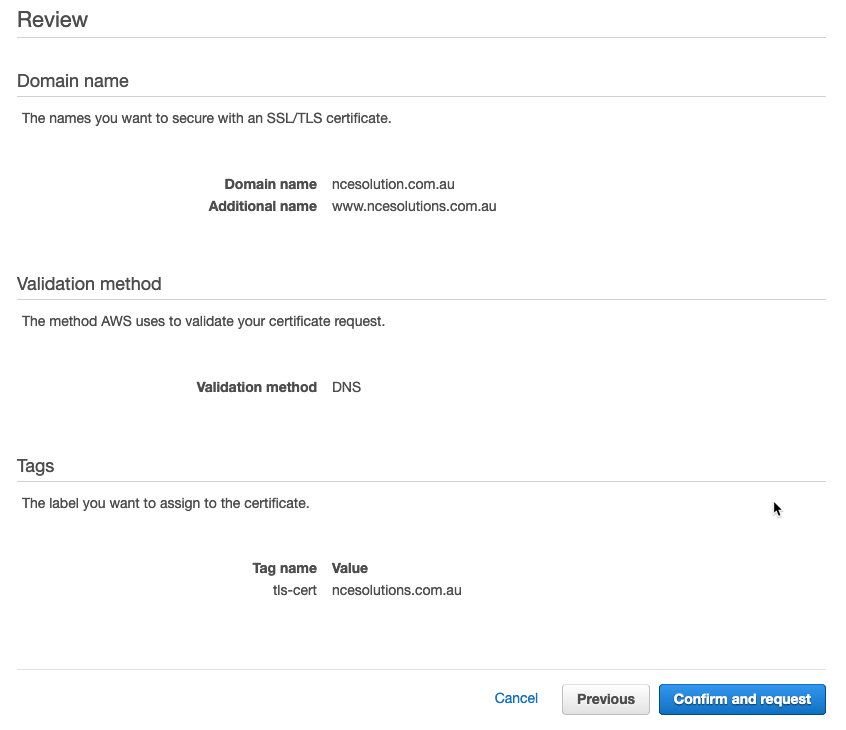
Review everything is as you expect and then press the Confirm and request button.
For each domain press the Create record in Route 53 button. This will create a CNAME record that is used to confirm that you are the owner of the domain you are generating certificates for.
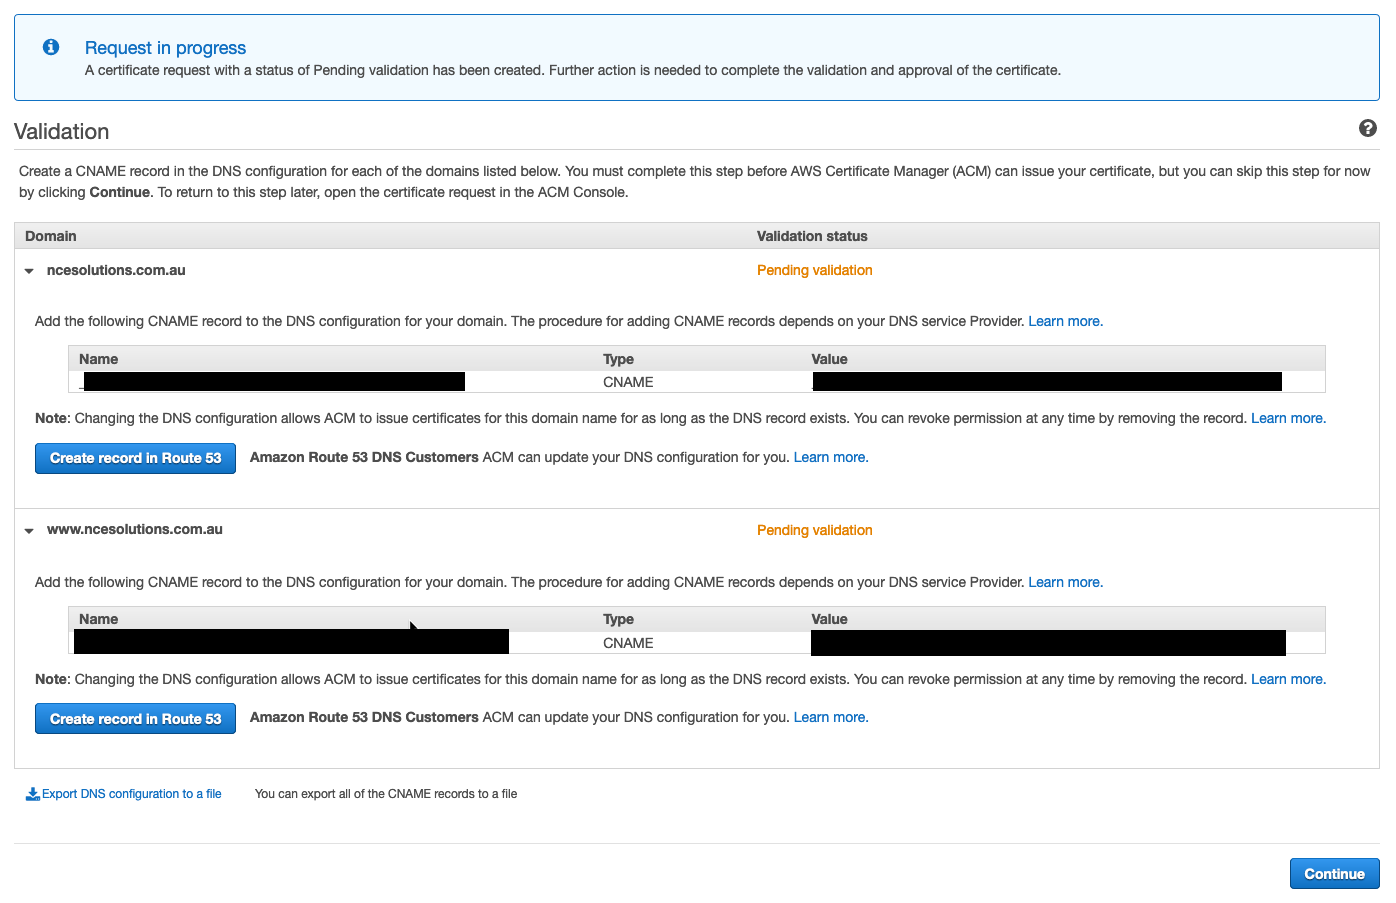
Once DNS has propagated the Validation status will change to Success .

Cloud Front
CloudFront is the AWS global CDN. CloudFront caches content at edge locations close you your users allowing them to access your content faster. Also CloudFront must be used if you want to enable HTTPs with a custom DNS name (Not the AWS S3 URL) for your S3 hosted website.
Create a Distribution
To create a Cloud Front distribution navigate to:
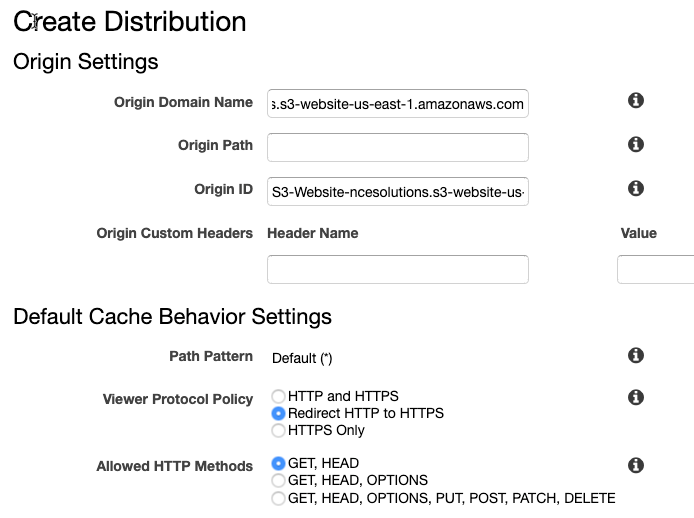
Origin Settings
Default Cache Behaviour Settings
Select the Redirect HTTP to HTTPS and the GET, HEAD radio buttons.
Distribution Settings
Enter the domain names you requested certificates for in the Alternate Domain Names text box.
Select the Custom SSL Certificate radio button and select the previously created certificate from Certificate Manager.
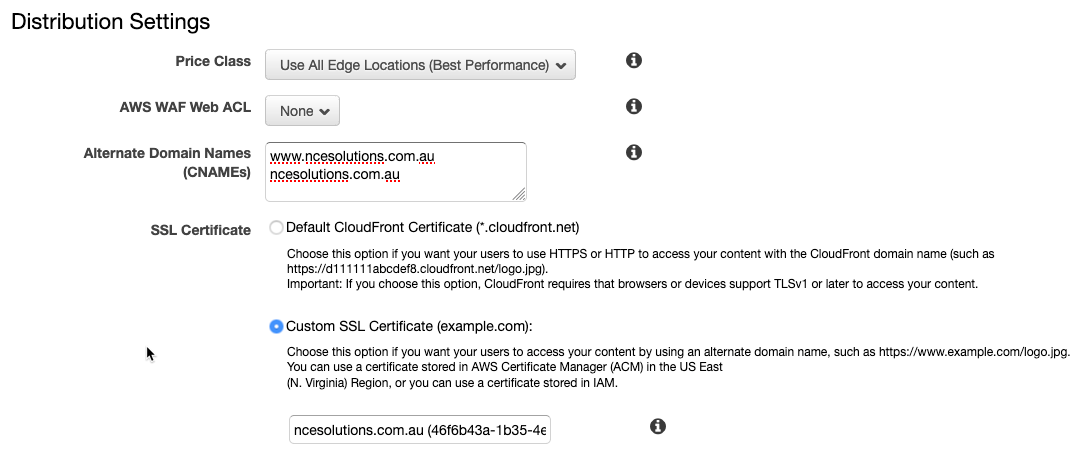
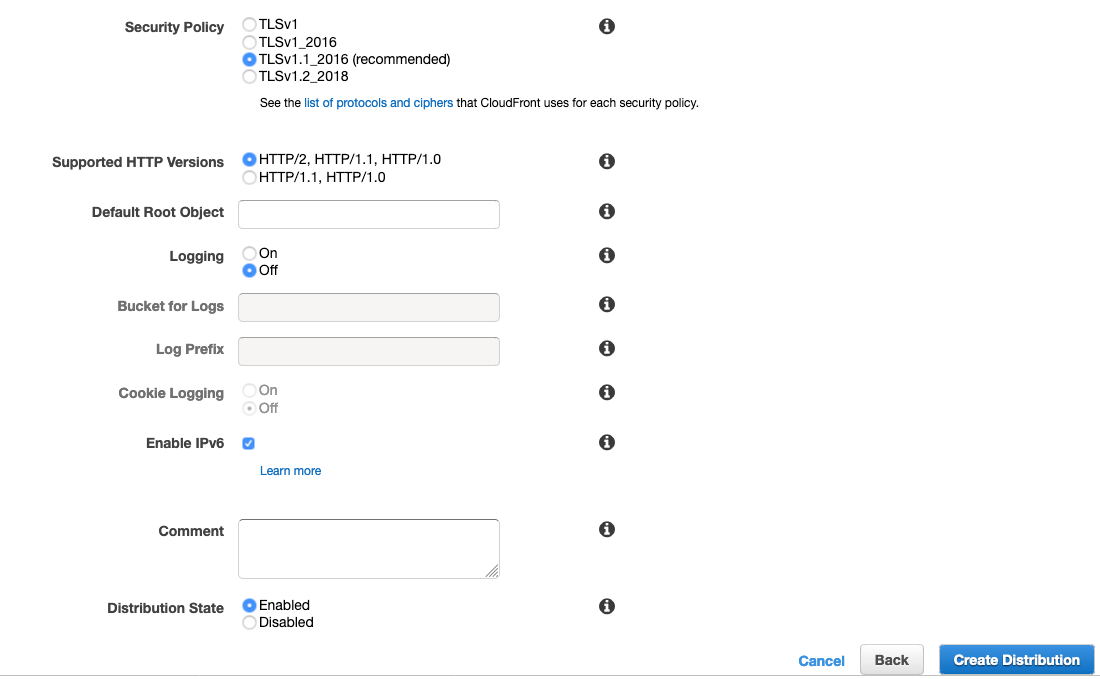
Select the Security Policy TLSv1.1_2016 radio button. and press the Create Distribution button.
Route 53
Route 53 allows us to manage the DNS records for our domain.
Create and Alias Record
An alias record allows us to point our domain to a CloudFront distribution. To create an alias record navigate to:
Select the Type as A from the dropdown and select the Alias: Yes radio button. In the Alias Target select the previously created CloudFront distribution and press the Save Record Set button.
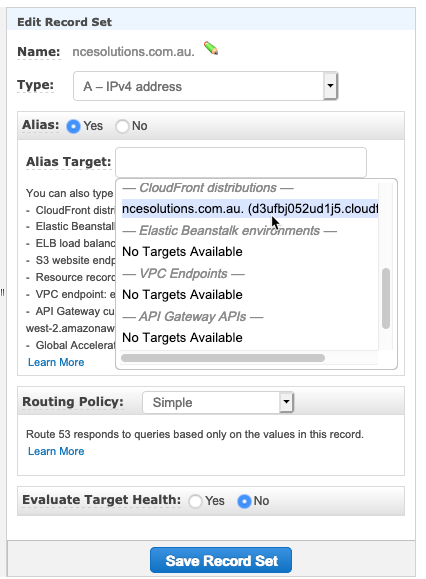
Repeat the same process for a AAAA record so that your site is also reachable over IPv6.
Testing
Once DNS has propagated you will be able to browse to your website and view all the glorious content.
Cost
Hosting my site on a DigitalOcean droplet was costing me $5 USD a month. The first month of hosting on AWS cost $2.54. So almost half the cost for a much better user experience and less futzing around with infrastructure. The following is the cost breakdown.
- Route 53 - $2.51
- S3 - $0.03
Outro
Hosting a static site on AWS is a pretty smooth process once you get your head around all the various bits an pieces. The global CDN makes it a nice user experience for your users where ever they may be in the world and the tight integration of the services makes it relatively painless to setup.
Links
https://stackoverflow.com/questions/49082709/redirect-to-index-html-for-s3-subfolder
https://medium.com/@sbuckpesch/setup-aws-s3-static-website-hosting-using-ssl-acm-34d41d32e394
https://www.davidbaumgold.com/tutorials/host-static-site-aws-s3-cloudfront/
https://www.freecodecamp.org/news/simple-site-hosting-with-amazon-s3-and-https-5e78017f482a/
https://docs.aws.amazon.com/AmazonS3/latest/dev/WebsiteAccessPermissionsReqd.html
https://aws.amazon.com/premiumsupport/knowledge-center/cloudfront-serve-static-website/
https://support.yondo.com/hc/en-us/articles/205794498-GoDaddy-Domain-Alias-Setup
https://simonecarletti.com/blog/2016/08/redirect-domain-https-amazon-cloudfront/